Page 10 of 13
Re: Another Engine Build thread stock type 1 dp
Posted: Thu Apr 19, 2012 9:24 pm
by SlowLane
ruckman101 wrote: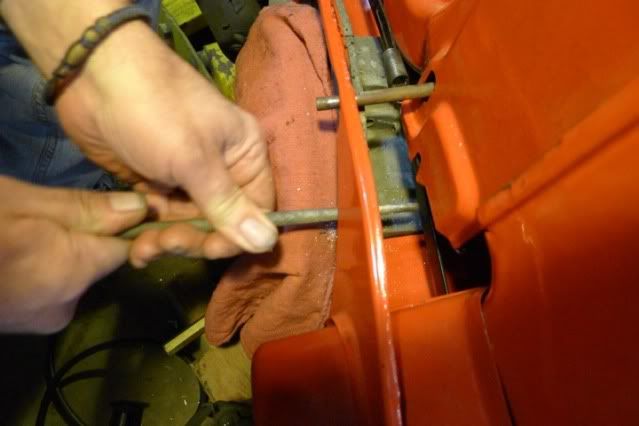
Great work with the threaded boss, Neal. I take it you've figured out that you need a hex-head bolt for that upper mount now.
I hate to bring this up now, and I don't want to cause you any more fretting, but are you missing the piece of tin generally referred to as "
the Hoover bit"?
Re: Another Engine Build thread stock type 1 dp
Posted: Thu Apr 19, 2012 10:06 pm
by ruckman101
Hoover bit be there. Still not real happy with two tin venting, but willing to work with it. Happily replaced D bolt with a hex head, oh yes.
I'm on the box wrench approach, thanks. I do have the magnet to fish stray hardware back out, provided it doesn't go all that far.
At this point my main objective is to get the pickup tube tightened back down and the screen strategically dented to fit.
I'll probably go camping first.
neal
Re: Another Engine Build thread stock type 1 dp
Posted: Fri Apr 20, 2012 1:06 pm
by hambone
That's the spirit! Camp first.
I wonder what the harm would be to just remove the offending circle-edge of the oil pickup..circle, using a dremel or whathaveyou. I like the spreader idea, but can't imagine such a tool. Some sort of ratcheting thing, an anti-3 armed puller. Denting the screen can help but only if everything else is aligned.
Hal might know of something, being mr. Hardware but he doesn't post a heck of lot.
Re: Another Engine Build thread stock type 1 dp
Posted: Fri Apr 20, 2012 6:03 pm
by Amskeptic
ruckman101 wrote:Hoover bit be there. Still not real happy with two tin venting, but willing to work with it. Happily replaced D bolt with a hex head, oh yes.
I'm on the box wrench approach, thanks. I do have the magnet to fish stray hardware back out, provided it doesn't go all that far.
At this point my main objective is to get the pickup tube tightened back down and the screen strategically dented to fit.
I'll probably go camping first.
neal
Pick-up tube? The whole bell + pipe assembly is loose? Isn't that the critical press fit deal that wants you to split the case to repair? There are no shortcuts, sweetpea.
Colin
Re: Another Engine Build thread stock type 1 dp
Posted: Sat Apr 21, 2012 9:33 am
by SlowLane
hambone wrote:That's the spirit! Camp first.
Yes! Gotta set priorities.
hambone wrote:
I wonder what the harm would be to just remove the offending circle-edge of the oil pickup..circle, using a dremel or whathaveyou.
Again referring to the photo on p. 41 of ye olde Beetle Bentley, it's pretty clear that the oil pickup cup, or shroud, or whatchamacallit, has a flat section where the mounting tab is welded, just as seen in Neal's photo. The only thing which looks like it
might be out of place on Neal's part is that his mounting tab looks like it may be bent to one side a bit. Camera angles can be misleading, of course.
But if the hole in the tab lines up with the threaded hole in the case, then there's no percentage in trying to straighten it, and much grief that could ensue if straightening attempts cause the other end of the pickup tube to work loose from the case. As Colin said, splitting the case is the only option if that happens. Unfortunately, if the pickup assembly is already wiggly, then you're pretty much SOL.
Re: Another Engine Build thread stock type 1 dp
Posted: Sat Apr 21, 2012 12:18 pm
by Amskeptic
Hambone wrote:I wonder what the harm would be to just remove the offending circle-edge of the oil pickup..circle, using a dremel or whathaveyou.
Installed in the engine?
Colin
Re: Another Engine Build thread stock type 1 dp
Posted: Tue Apr 24, 2012 7:35 pm
by ruckman101
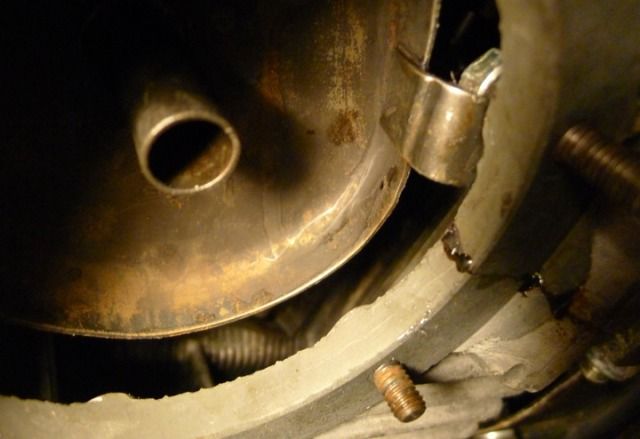
You are right SlowLane, referencing it would appear that yes, there is a flat spot on the cup of the assembly where the tab comes down that appears to be normal, the same as the one I checked in the newfound case.
And yes, the tab is crimped a bit out towards the drain plug so that the bottom lip of the strainer hits it.
Without the nut holding down the assembly at that tab, it flopped up, pivoting on the tube that goes into the case. Loose, but in place.
I did get the nut back on, tightened as best I could with Permatex red threadlocker on the stud.
I have a feeling I'm going to be sticking a finger up there to confirm that nut is still there every time I drop the screen for an oil change.
I tried box wrenches, pliers, fingers and nothing was cutting it to get that nut back on so I crafted a quick inexpensive specialty tool.
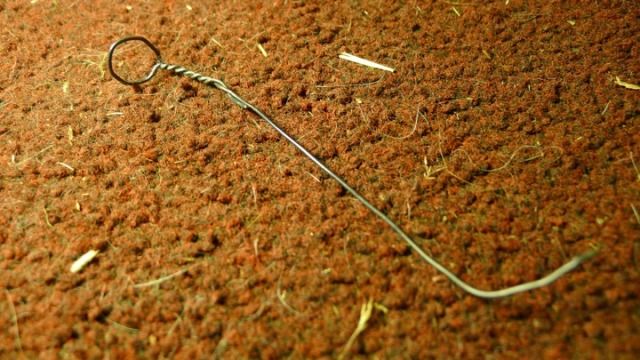
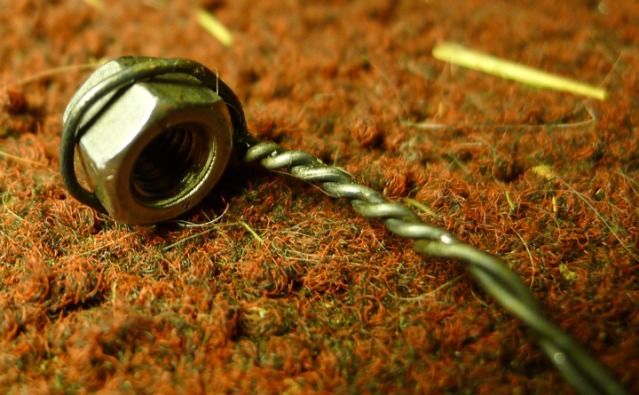
With a little "Gypsy Gel" aka petroleum jelly to keep it in place did the trick and helped with the tightening process, too. So next is bending that bottom lip on my screen enough to clear the gimped tab on the cup.
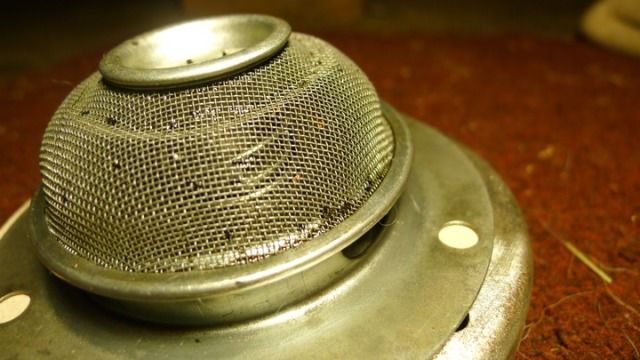
My instinct is to try the bend over one of the three open slots under that lip rather than the solid walled option along the base.
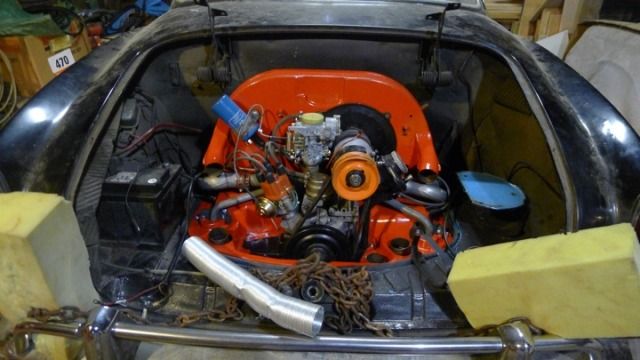
Otherwise, got the wire for the backup lights fed through the back tin rather than between it and the seal like it was. Was lucky to find a rubber grommet on a spare piece of tin I was able to use. Fantastic. Can you connect those two spades wrong? Got heater tubes placed, missing one seal/clamp assembly on the driver's side, so it just flops loose at the moment. Checked the clutch, and yep, adjusted much too tight, have to back that off still. Made sure the engine seals were fully in place. Put the back tin on with the two little heat riser bits, had to adjust the exhaust bubble connections to the exchangers that come up through that back tin, and it is less than just exactly perfect. And last but not least soaking and cleaning the air filter with clamps for the heater hosing.
Air cleaner, screen drain plate bit (letting the permatex fully fully cure), clutch adjust, electric, charge battery, add oil, oops, forgot, still have to reattach the coupler to the transaxle, check valve gap, check point gap just to be sure, static timing and should be good to start if the starter assembly doesn't melt because I've wired it wrong. Smoke tests.
The kittens haunting me when I began are now having sex,
neal
Re: Another Engine Build thread stock type 1 dp
Posted: Tue Apr 24, 2012 7:47 pm
by dtrumbo
ruckman101 wrote:Can you connect those two spades wrong?
If you're talking about the spades that connect to the switch on the transaxle, no. Either way is fine.
ruckman101 wrote:The kittens haunting me when I began are now having sex,
neal
Ah kittens, they grow up so fast nowadays.
Re: Another Engine Build thread stock type 1 dp
Posted: Tue Apr 24, 2012 7:48 pm
by ruckman101
Reassuring, thanks dtrumbo.
neal
Re: Another Engine Build thread stock type 1 dp
Posted: Tue Apr 24, 2012 9:40 pm
by hambone
Good job, good luck, looks nice.
Re: Another Engine Build thread stock type 1 dp
Posted: Tue Apr 24, 2012 11:29 pm
by Amskeptic
ruckman101 wrote:pivoting on the tube that goes into the case. Loose, but in place.
If the pipe was loose where it goes into the case, you have a potential problem with cavitation. The pump will be sucking for oil and taking in air at the joint where the pipe enters the case.
Look for bubbles on your dipstick, or foamy oil at at a hot oil change, do not let the oil level get low, and good luck, skippy, it shore is purty.
Colin
Re: Another Engine Build thread stock type 1 dp
Posted: Wed Apr 25, 2012 7:55 am
by SlowLane
ruckman101 wrote:I tried box wrenches, pliers, fingers and nothing was cutting it to get that nut back on so I crafted a quick inexpensive specialty tool.
Love it! l'll have to remember that trick.

ruckman101 wrote:check point gap just to be sure, static timing
If that's a vacuum-only dizzy, then static timing should suffice. If it's got centrifugal advance as well, you'll want to time it again with a timing light when you get it running.
ruckman101 wrote:kittens ... having sex
teenagers

Re: Another Engine Build thread stock type 1 dp
Posted: Mon Apr 30, 2012 10:33 pm
by ruckman101
Tomorrow.
Added the oil today. Got the air filter on. Again a minor restoration. The last hosing, ground strap grounded, sitting on all four wheels, deck lid back on ... ready.
Fingers crossed on the starter electrics, hoping to immediately move to, static timing, oil pressure priming, and the start. Twenty minute "meet who you'll be playing with" break in run followed by an oil change, valve check etc.
And a transaxle oil level check. I should make sure, because I haven't yet, that there is actually oil in this transaxle bought used. The plan is to drive it a bit to warm it up and then immediately drain and fill with new oil.
nervous, puckering, giddy, full of hopes of perfection,
neal
Re: Another Engine Build thread stock type 1 dp
Posted: Tue May 01, 2012 7:31 pm
by ruckman101
Stymied.
Turned the key and the ignition on today, looking for any smoking, insulation dripping issues with the wiring, especially at the starter. No worries. Warning lights lit. Go to tap the starter, just to check before static timing and first start. Nothing.
I can hear a clink at the solenoid when the key is turned, but that's it.
Flummoxed. The hot start relay set-up came off of there, but after figuring out one of the three wires coming off the relay was a ground and didn't want to be connected to the large post on the solenoid with the positive cable from the battery and #30 from the relay.
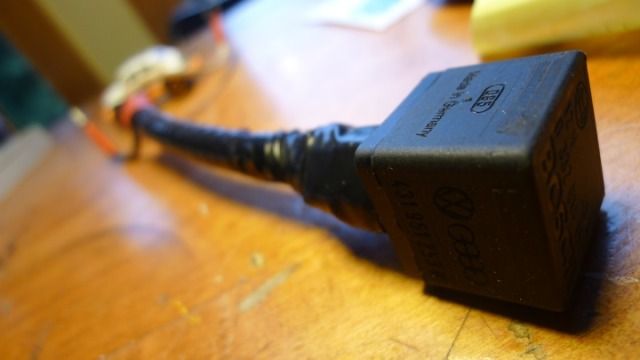
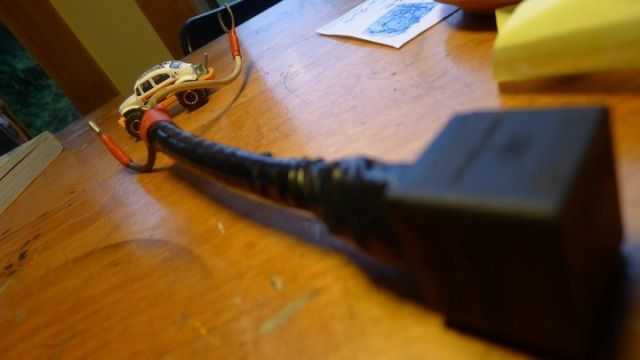

So the white wire is the ground, but when I get the green and black wires connected to the solenoid, there isn't enough of the white wire to connect to ground anywhere that I can see. But there was originally. It was connected to something.
Perplexing. So I want to extend the white wire, replace the connector, and bolt it under the nut that holds the starter in place. Not the engine side, but the bottom starter bolt.
vrroooom,
neal
Re: Another Engine Build thread stock type 1 dp
Posted: Tue May 01, 2012 10:42 pm
by Gypsie
Isn't one of the posts on the starter solonoid a ground?