Wheel Bearing Repack II (bw pig)
Posted: Mon Nov 12, 2007 7:04 pm
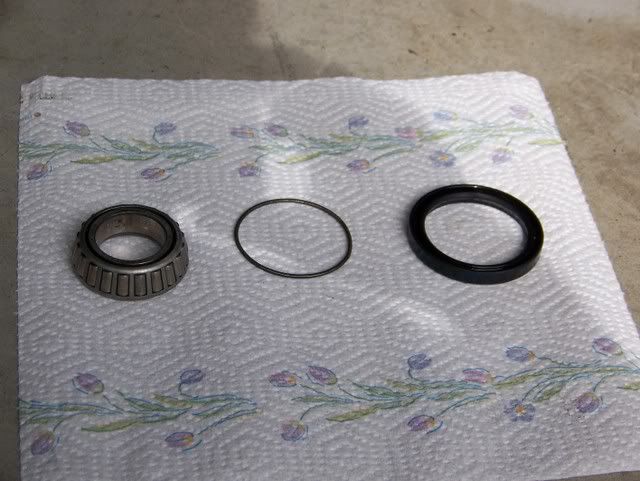
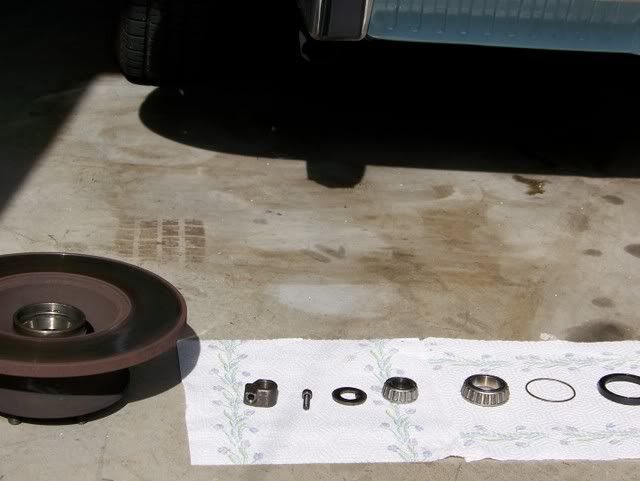
We're at maximum disassembly for this job, and parts are being cleaned (even if you have new ones, clean the old ones for forensic clues). Take the little spring out of the wheel bearing seal lip so you can clean, if you are re-using the seal:
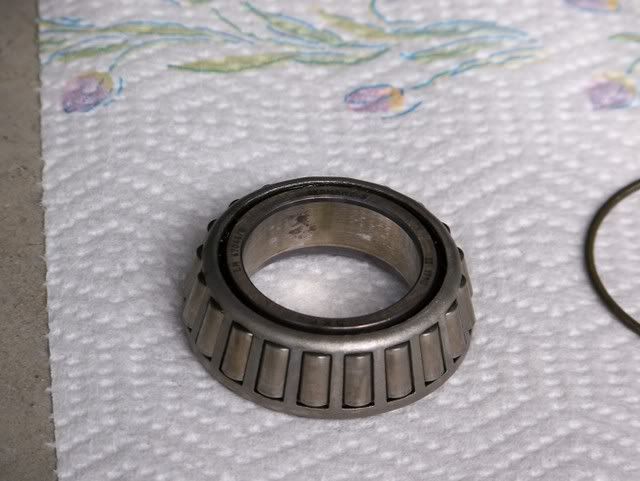
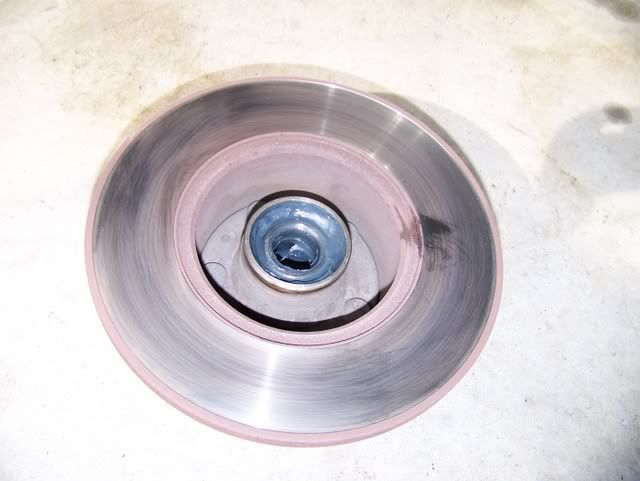
What I thought were damaged bearings were actually not damaged. The rollers were not blue or scored or loose in the cage. The inner bearing's play that I had felt, even after I had tightened the bearing locknut to 5 ft/lbs to test, was strictly due to slop between the inner bearing race and the steering spindle. Look at the inner race-to-spindle surface. See the discoloration? That is impact damage due to play. This slop only gets greater over time as the inner bearing race starts to slowly rotate on the spindle. I had loose bearings for too long, this exacerbated the rotation that we do not want, now do we, no, of course not:
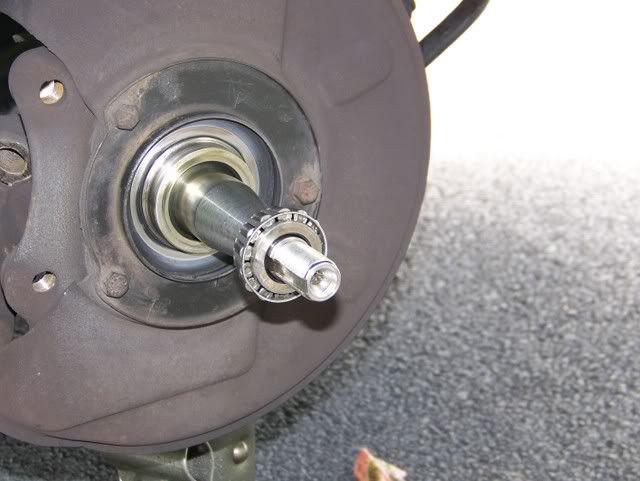
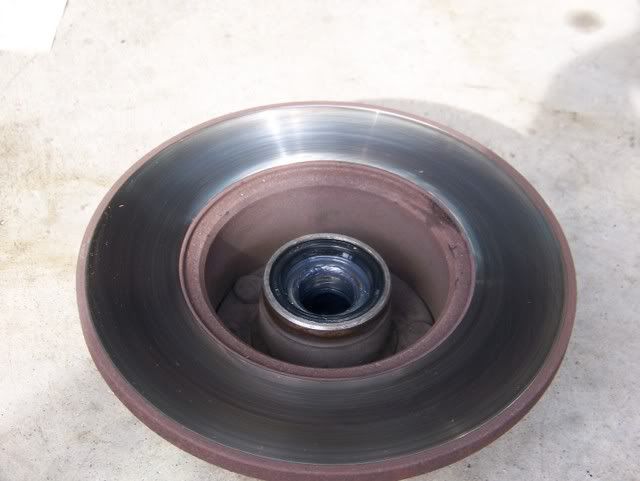
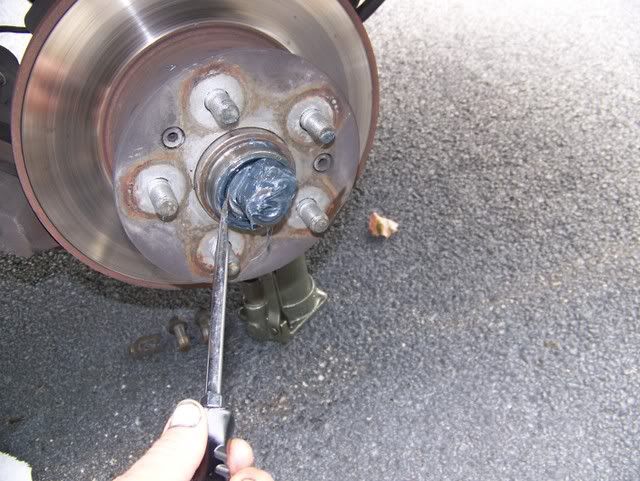
Here, the outer bearing's inner race is being tested for slop on the spindle. It is normal to have a barely discernable bit o click:
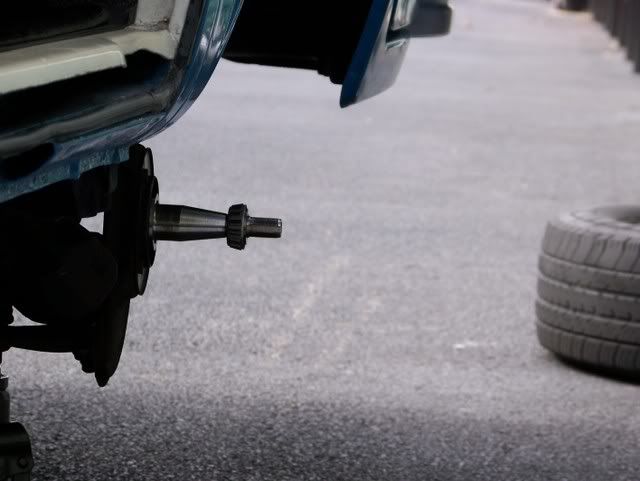
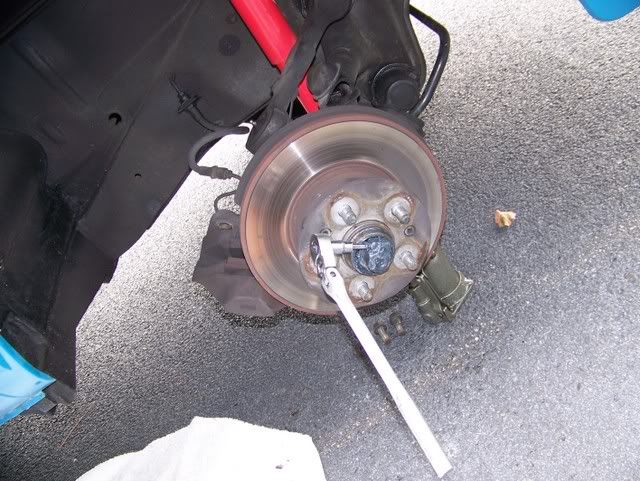
Philosophical Muse. . . . look at how utterly tiny that forlorn little bearing is, sitting on the spindle waiting for more curves and bumps, it must be treated with great respect. . . like CLEAN and WELL-LUBRICATED and CORRECTLY ADJUSTED:
I re-used my seals and bearings (good German SKF) so I cleaned them in a small bucket with GumOut carb spray through the little red nozzle, excellent cleaning method, blast every bit of old grease out. Do not spin the bearings when dry. Clean out the hub totally clean, no greasy pawprints on the rotor/disk . . . likewise, do not clean the brake disk right now, you do not want to dislodge the rusty flakes in our operating theatre. Everything is laid out. Note that I removed the 6mm bolt from the nut to clean out its recesses:
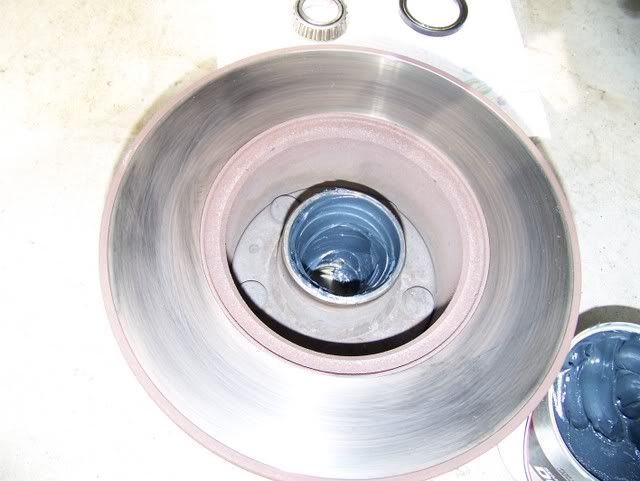
The hub has been coated with a layer of Valvoline DuraBlend semi-synthetic molybdenum disulfide grease to make a smooth cylinder between the outer and inner bearing races:
.
Get some clean paper towels at the ready. Have all of your parts readily accessible and soooo clean. Put the little spring back in the wheel seal. Fill the cavity where the spring went into the seal, this will serve as a "heat transfer-mastic" to keep the lip pliable for twice as long as would otherwise be expected.
Pack the inner (bigger) bearing with grease, you want every roller thoroughly coated inside and out. Use two fingers to lock the inner race stationary and rotate the cage while you pack every cranny until it is thoroughly greased, get both edge views of the bearing too. Set the bearing in the hub, no stray stalactites of grease dripping on the disk please (and don't say anything when you see the picture). Now fill the hub so that you have a smooth cylinder of grease from the inner bearing race on down into the hub about halfway. I slightly "undergrease" when using this moly grease as opposed to that fibrous lithium grease junk that turns into peanut butter. The moly grease flows easier when warm, so don't use too much or it will weep out past seals and dust caps:
Clean your hands.
Now press the seal into the hub until it seats. You can do it with your hands to keep it free from distortion. Wipe the excess grease from between the seal and the bearing and then the outer perimeter of the seal. Wipe your hands clean:
With clean hands, pick up the hub/rotor disk by its edge and slap it onto the clean spindle. Center the spindle in the outer bearing opening and make sure it gently seats in as far as it will go. Let it droop down. Stick a glob of grease into the opening and make sure you burp any air pocket out. Pack the outer bearing thoroughly (this bearing keeps the wheel on) and stick it in the opening until it trues up the hub/rotor. Follow it with the clean washer and the nut with the 6mm lock bolt. Just before things get snug, grab the washer behind the nut and move it back and forth and make a note of its range of back and forth movement, it is indexed to the spindle slot so it only moves in a set way. Wipe your hands. Rotate the hub by grasping a wheel stud only (no greasy hands on the rotor!) and snug up the nut to no more than 5 ft/lbs snuggish (a little more if you put new races in) with your adjustable wrench or whatever, keep it rotating through this snuggling up. Then, while still rotating the hub/rotor, back your adjustable wrench until you feel/see the subtle freeing up of the washer as it unloads from the nut. You may see the washer do a little rotation backwards as it frees up from the 5 ft/lbs point. Repeat it until you have a grasp of this point where the washer/nut/bearing just get free of each other:

NOW THEN. Be attentive. You put this all together, you know there is a bearing just to the inside of that fat flat washer. We are going to test the bearing adjustment by prying on the washer only! Do not stick your flat blade screwdriver in so far that you are bending the cage of the bearing. Sure it is greasy and hard to see and all, but just the tip of the screwdriver. Put it at 9:00 (on the clock dial) between the hub inner radius and the flat washer, hold the hub from turning with a grip on a wheel stud, and turn the screwdriver like you are loosening a screw to pry the washer sideways. It might already be moved, so don't get all monkey on it. Go to the 3:00 position and try to pry back. You should get a sticky movement. If everything is unyielding, back off the nut until you can move that washer totally sloppy and record the range of its movement, so you'll know what to do as you tighten it (wheel rotating) and then loosen it until the washer just decouples from the nut. You want the nut tight enough to make sliding the washer sideways moderately (new bearings) or slightly (old repacked bearings) sticky:
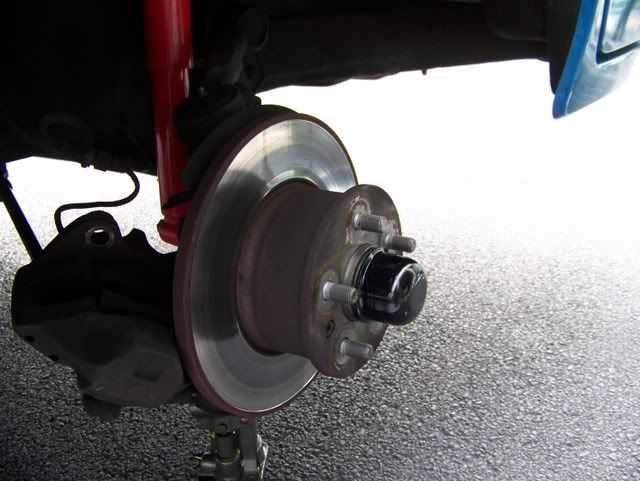
Tighten the 6mm lock bolt in the nut when you are done. Not too crazy, it locks the nut onto the spindle threads very effectively:
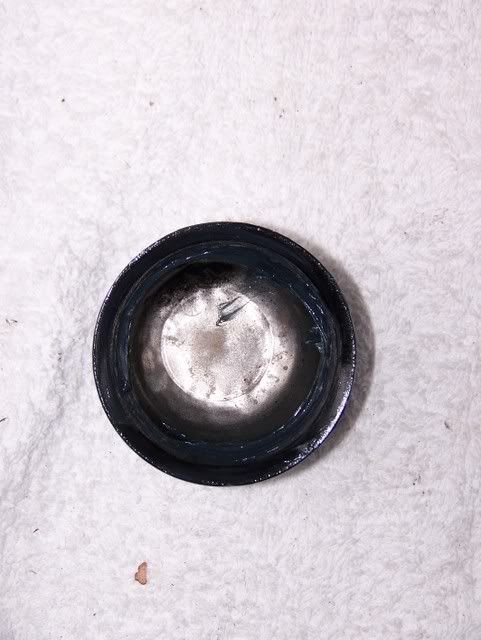
Make a ring of grease dam inside the dust cover:
If you have the driver's side off, align the square speedometer cable end with the square hole in the dust cover. Reach around to the inside of the steering spindle and push the cable sheath out towards your hand holding the dust cap. The two will mate easily. Put your circlip on the cable. Grab a 19mm + box wrench and wrap it in a towel with a little depression in the middle for the speedo circlip/cable. Hammer the box end and the cap will go on with nary a scratch on your new paint:
Install your caliper and brake hose retainer c-clip. Caliper bolts do not need to be tightenedto death. No more than the lug nuts up to 1973, '73 and after a bit more but 112 ft/lbs is still not much.
Put wheel on, and snug those lug nuts firmly with the wheel still off the ground so you can center the wheel with no load on it. Jack down, torque your wheels to 85/90 ft/lbs (anti-seized wheel stud threads for us north-eastern types) 94 ft/lbs dry threads. *Pump up your brake pedal to get the pads back out against the disk* Wax the wheels and hubcaps:
Now go help jump start that guy who was listening to loud music and ran down his Big Chevy's battery at the storage place. As your car hurtles backwards towards his left front fender, remember that you did not pump the brake pedal up after you had pried the pads out to get the calipers off*:

Readjust your wheel bearings after 200 miles if you put new races in. Otherwise, check any time by rocking the top of the tire in and out. If it is lightly clicky, yer OK, if it is clunky, you're not.
Colin
What I thought were damaged bearings were actually not damaged. The rollers were not blue or scored or loose in the cage. The inner bearing's play that I had felt, even after I had tightened the bearing locknut to 5 ft/lbs to test, was strictly due to slop between the inner bearing race and the steering spindle. Look at the inner race-to-spindle surface. See the discoloration? That is impact damage due to play. This slop only gets greater over time as the inner bearing race starts to slowly rotate on the spindle. I had loose bearings for too long, this exacerbated the rotation that we do not want, now do we, no, of course not:
Here, the outer bearing's inner race is being tested for slop on the spindle. It is normal to have a barely discernable bit o click:
Philosophical Muse. . . . look at how utterly tiny that forlorn little bearing is, sitting on the spindle waiting for more curves and bumps, it must be treated with great respect. . . like CLEAN and WELL-LUBRICATED and CORRECTLY ADJUSTED:
I re-used my seals and bearings (good German SKF) so I cleaned them in a small bucket with GumOut carb spray through the little red nozzle, excellent cleaning method, blast every bit of old grease out. Do not spin the bearings when dry. Clean out the hub totally clean, no greasy pawprints on the rotor/disk . . . likewise, do not clean the brake disk right now, you do not want to dislodge the rusty flakes in our operating theatre. Everything is laid out. Note that I removed the 6mm bolt from the nut to clean out its recesses:
The hub has been coated with a layer of Valvoline DuraBlend semi-synthetic molybdenum disulfide grease to make a smooth cylinder between the outer and inner bearing races:
.
Get some clean paper towels at the ready. Have all of your parts readily accessible and soooo clean. Put the little spring back in the wheel seal. Fill the cavity where the spring went into the seal, this will serve as a "heat transfer-mastic" to keep the lip pliable for twice as long as would otherwise be expected.
Pack the inner (bigger) bearing with grease, you want every roller thoroughly coated inside and out. Use two fingers to lock the inner race stationary and rotate the cage while you pack every cranny until it is thoroughly greased, get both edge views of the bearing too. Set the bearing in the hub, no stray stalactites of grease dripping on the disk please (and don't say anything when you see the picture). Now fill the hub so that you have a smooth cylinder of grease from the inner bearing race on down into the hub about halfway. I slightly "undergrease" when using this moly grease as opposed to that fibrous lithium grease junk that turns into peanut butter. The moly grease flows easier when warm, so don't use too much or it will weep out past seals and dust caps:
Clean your hands.
Now press the seal into the hub until it seats. You can do it with your hands to keep it free from distortion. Wipe the excess grease from between the seal and the bearing and then the outer perimeter of the seal. Wipe your hands clean:
With clean hands, pick up the hub/rotor disk by its edge and slap it onto the clean spindle. Center the spindle in the outer bearing opening and make sure it gently seats in as far as it will go. Let it droop down. Stick a glob of grease into the opening and make sure you burp any air pocket out. Pack the outer bearing thoroughly (this bearing keeps the wheel on) and stick it in the opening until it trues up the hub/rotor. Follow it with the clean washer and the nut with the 6mm lock bolt. Just before things get snug, grab the washer behind the nut and move it back and forth and make a note of its range of back and forth movement, it is indexed to the spindle slot so it only moves in a set way. Wipe your hands. Rotate the hub by grasping a wheel stud only (no greasy hands on the rotor!) and snug up the nut to no more than 5 ft/lbs snuggish (a little more if you put new races in) with your adjustable wrench or whatever, keep it rotating through this snuggling up. Then, while still rotating the hub/rotor, back your adjustable wrench until you feel/see the subtle freeing up of the washer as it unloads from the nut. You may see the washer do a little rotation backwards as it frees up from the 5 ft/lbs point. Repeat it until you have a grasp of this point where the washer/nut/bearing just get free of each other:
NOW THEN. Be attentive. You put this all together, you know there is a bearing just to the inside of that fat flat washer. We are going to test the bearing adjustment by prying on the washer only! Do not stick your flat blade screwdriver in so far that you are bending the cage of the bearing. Sure it is greasy and hard to see and all, but just the tip of the screwdriver. Put it at 9:00 (on the clock dial) between the hub inner radius and the flat washer, hold the hub from turning with a grip on a wheel stud, and turn the screwdriver like you are loosening a screw to pry the washer sideways. It might already be moved, so don't get all monkey on it. Go to the 3:00 position and try to pry back. You should get a sticky movement. If everything is unyielding, back off the nut until you can move that washer totally sloppy and record the range of its movement, so you'll know what to do as you tighten it (wheel rotating) and then loosen it until the washer just decouples from the nut. You want the nut tight enough to make sliding the washer sideways moderately (new bearings) or slightly (old repacked bearings) sticky:
Tighten the 6mm lock bolt in the nut when you are done. Not too crazy, it locks the nut onto the spindle threads very effectively:
Make a ring of grease dam inside the dust cover:
If you have the driver's side off, align the square speedometer cable end with the square hole in the dust cover. Reach around to the inside of the steering spindle and push the cable sheath out towards your hand holding the dust cap. The two will mate easily. Put your circlip on the cable. Grab a 19mm + box wrench and wrap it in a towel with a little depression in the middle for the speedo circlip/cable. Hammer the box end and the cap will go on with nary a scratch on your new paint:
Install your caliper and brake hose retainer c-clip. Caliper bolts do not need to be tightenedto death. No more than the lug nuts up to 1973, '73 and after a bit more but 112 ft/lbs is still not much.
Put wheel on, and snug those lug nuts firmly with the wheel still off the ground so you can center the wheel with no load on it. Jack down, torque your wheels to 85/90 ft/lbs (anti-seized wheel stud threads for us north-eastern types) 94 ft/lbs dry threads. *Pump up your brake pedal to get the pads back out against the disk* Wax the wheels and hubcaps:
Now go help jump start that guy who was listening to loud music and ran down his Big Chevy's battery at the storage place. As your car hurtles backwards towards his left front fender, remember that you did not pump the brake pedal up after you had pried the pads out to get the calipers off*:
Readjust your wheel bearings after 200 miles if you put new races in. Otherwise, check any time by rocking the top of the tire in and out. If it is lightly clicky, yer OK, if it is clunky, you're not.
Colin