
Oregon72 engine rebuild
-
bajaman72
- Addicted!
- Location: Quartz Hill, CA
- Contact:
- Status: Offline
-
Amskeptic

- IAC "Help Desk"

- Status: Offline
A) 12º from longitudinal axis would be parallel to crankcase centerline is 12 and 6 oclock, your slot should be at sort of 11 and 5 oclock. Were you thinking more Type 1 ish where the slot is perpendicular to the crankshaft center line 9-3 and you set it to 10-4? Just trying to make sense of the mystery here.Oregon72 wrote:
A) Colin, I have the original VW 021-905-205E dizzy.
B) Not really making it to top speed like it feels like it could.
C) I am having a bit of a hard time getting the idle just right as well. So far, I've only messed with idle speed screw (the big one) - I'm scared of the mixture screws to tell you the truth.
D) There appears to be a little bit of an oil leak at the oil pressure relief valve. Not big enough to drip, but just a little bit wet there. I remember not using permatex 3H on this and now I regret it. You can see the oil forming at about the 9 o'clock position.
B) Don't even think of top speed and performance, don't even think of comparing it. You have new rings scraping along honed cylinder walls. Give it 1,000 miles to loosen up before any comparison to what you expect. The 1972 Type 4 bus with a clutch drop 2,500 rpm start and tortuous 18/38/59 shifts by a stupid car magazine is going to give you a 23 second 0-60 . . . broken in. Right now, you probably have less torque than a Type 1 bus and you are not likely to be utilizing the horsepower which only comes on further up in the ranges. We have 50-60 and 50-70 clock results here on the site, I keep forgetting where, where no shifting is required ( a good thing to get rid of abuse and variables in shifting behavior). You might want to compare results with that, and remember to do both directions and average them out.
C) After 100 miles or so, warm idling engine:
1. Remove retard hose from distributor (blocking the hose is not important).
2. Remove central idling solenoid wire.
You should have a similar idle to when you began, but now it is dual carbs only.
3. Remove vacuum hose from right air horn at thermovacuum switch (the one coming from the brake booster elbow) and have your finger tip poised to block and unblock the end of the hose.
4. Read the mixtures from the behavior of this hose when you take your finger half off the end of the hose.
a) idle goes down (lean)
b) idle remains the same or roughens a little with no loss of rpm (nice)
c) idle goes up (rich)
We want slightly lean and we want both carbs doing the same amount of work.
5) Remove the cutoff solenoid wire from left carb, read rpms, replace wire.
Remove cutoff solenoid from right carb, read rpms, replace wire.
Which carb is working less?
ex. if you removed the left wire and the rpms dropped to 450, then removed right wire and rpms were 500, that means the right carb is doing less work than the left carb.
With above example of idle drop numbers:
If 4a, richen right carb a tad (1/4 turn)
If 4b richen right carb and lean left carb equal amounts (1/8 ea)
If 4c lean left carb (1/4 turn)
When done, we want both carbs dropping an equal amount when you pull off the cutoff wires one at a time, and we want the vacuum hose-finger off test to give you a slight drop in rpms when you add air by removing your finger a bit from the end of the hose.
6) NOW put the central idling circuit wire back on and blip the throttle to kick the central idling circuit on. Put vacuum retard hose back on. Idle should settle down to about 950-1,000 rpm.
Put your finger on the vacuum hose end and when you roll it off the end of the hose, we would like the idle to go up a bit. Adjust the mixture screw on the central idling circuit (the little guy to the left of the intake on the left carb).
7) Final adjustment is the idle speed with all hoses on 1,050 during break-in and it may need to be turned down incrementially as the internal engine friction drops.
See how you don't want to do this when the engine needs to stay away from too much idling when brand new?
D) You can cinch the pressure relief screw right now. Get a big serious flat chisel or anything else big and bladed, and put the bottle jack under the screw with your bladed thing in the slot. Trap the chisel between the jack and the engine and jack it up a bit, then turn cw to tighten. Nothing crazy, just firm. Clean and dry the area. Check the 13mm nuts in the area! There is a 13mm case fastener that likes Permatex on the threads and both sides of its washer. Torque to 13 ft/lbs. Clean, recheck, clean.
Colin
BobD - 78 Bus . . . 112,730 miles
Chloe - 70 bus . . . 217,593 miles
Naranja - 77 Westy . . . 142,970 miles
Pluck - 1973 Squareback . . . . . . 55,600 miles
Alexus - 91 Lexus LS400 . . . 96,675 miles
Chloe - 70 bus . . . 217,593 miles
Naranja - 77 Westy . . . 142,970 miles
Pluck - 1973 Squareback . . . . . . 55,600 miles
Alexus - 91 Lexus LS400 . . . 96,675 miles
-
Gypsie

- rusty aircooled mekanich
- Location: Treadin' Lightly under the Clear Blue!
- Status: Offline
This needs a nice little nook to sit and wait for someone to come look at it:
Not sure about the Title, CK will adjust/edit as needed I hope.
Dual Carb Adjustment:
After 100 miles or so, warm idling engine:
1. Remove retard hose from distributor (blocking the hose is not important).
2. Remove central idling solenoid wire.
You should have a similar idle to when you began, but now it is dual carbs only.
3. Remove vacuum hose from right air horn at thermovacuum switch (the one coming from the brake booster elbow) and have your finger tip poised to block and unblock the end of the hose.
4. Read the mixtures from the behavior of this hose when you take your finger half off the end of the hose.
a) idle goes down (lean)
b) idle remains the same or roughens a little with no loss of rpm (nice)
c) idle goes up (rich)
We want slightly lean and we want both carbs doing the same amount of work.
5) a. Remove the cutoff solenoid wire from left carb, read rpms, replace wire.
b. Remove cutoff solenoid from right carb, read rpms, replace wire.
Which carb is working less?
ex. if you removed the left wire and the rpms dropped to 450, then removed right wire and rpms were 500, that means the right carb is doing less work than the left carb.
With above example of idle drop numbers:
If 4a, richen right carb a tad (1/4 turn)
If 4b richen right carb and lean left carb equal amounts (1/8 ea)
If 4c lean left carb (1/4 turn)
When done, we want both carbs dropping an equal amount when you pull off the cutoff wires one at a time, and we want the vacuum hose-finger off test to give you a slight drop in rpms when you add air by removing your finger a bit from the end of the hose.
6) NOW put the central idling circuit wire back on and blip the throttle to kick the central idling circuit on. Put vacuum retard hose back on. Idle should settle down to about 950-1,000 rpm.
Put your finger on the vacuum hose end and when you roll it off the end of the hose, we would like the idle to go up a bit. Adjust the mixture screw on the central idling circuit (the little guy to the left of the intake on the left carb).
7) Final adjustment is the idle speed with all hoses on 1,050 during break-in and it may need to be turned down incrementially as the internal engine friction drops.
See how you don't want to do this when the engine needs to stay away from too much idling when brand new?
This too:
Pressure Relief Screw Cinch
Get a big serious flat chisel or anything else big and bladed, and put the bottle jack under the screw with your bladed thing in the slot. Trap the chisel between the jack and the engine and jack it up a bit, then turn cw to tighten. Nothing crazy, just firm. Clean and dry the area. (Check the 13mm nuts in the area! There is a 13mm case fastener that likes Permatex on the threads and both sides of its washer. Torque to 13 ft/lbs. Clean, recheck, clean. )
Field/shop tips or T&D??? Hmmm...
I agree that you have some drivin and dialin' in to do before comparisons have any merit. New lungs and parts just gettin to know one another, don't ya know.
Your "homeschool tool" brought a tear to my eye. It was as beautiful in its design as it's inspired execution of reverese engineering. snf.
So it all started when I wanted to get better gas mileage....
-
covelo
- Old School!
- Location: Fairfax, CA
- Status: Offline
Congratulations on the beautiful engine! Looks like you have the distributor lined up exactly like mine now (also a 1972). Mine also wasn't oriented correctly when I got my AVP engine (it had an 009 at the time), so when I got my used dual vacuum distributor it wasn't properly adjustable either. Jberger helped me adjust the drive pinion, just like you did.Oregon72 wrote: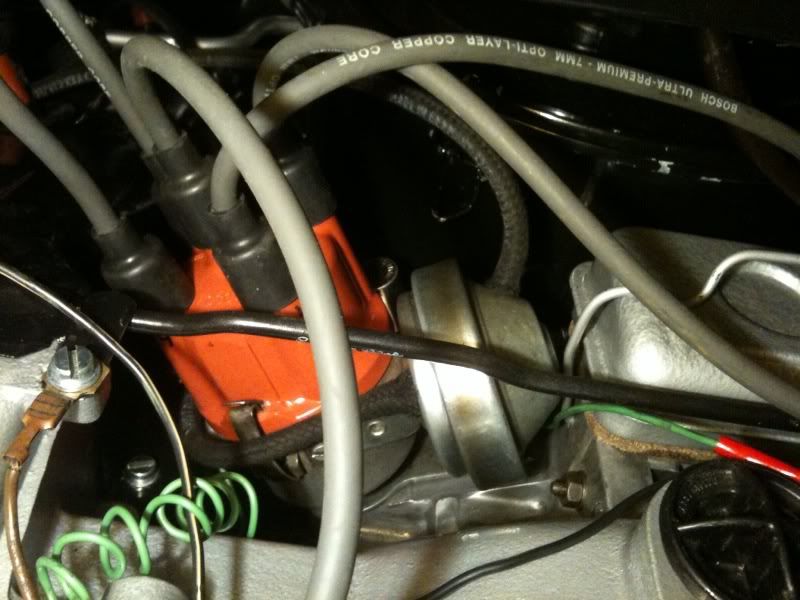


‘80 Vanagon Westfalia - 54,400 miles
'91 Toyota Pickup (4WD long bed) - 199,960 miles
1987 Alfa Spider Veloce - 166,400 miles
2017 VW E-Golf - 5,600 miles
'91 Toyota Pickup (4WD long bed) - 199,960 miles
1987 Alfa Spider Veloce - 166,400 miles
2017 VW E-Golf - 5,600 miles
-
vistacruzer

- IAC Addict!
- Location: portland
- Status: Offline

-
Oregon72

- IAC Addict!
- Location: Sherwood, Oregon
- Status: Offline
bajaman72 wrote:=D> Great Job! Lookin forward to the video.
Here you go. The best thing about this video is the fact that I found out I had a brake light out
http://s491.photobucket.com/albums/rr28 ... G_0887.flv
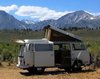
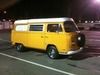
-'72 Westy-
-
Oregon72
- IAC Addict!
- Location: Sherwood, Oregon
- Status: Offline
This is PURE GOLD!!! Simple and easy - I need it explained like a kindergartener for me to understand it and this is perfect.Amskeptic wrote:A) 12º from longitudinal axis would be parallel to crankcase centerline is 12 and 6 oclock, your slot should be at sort of 11 and 5 oclock. Were you thinking more Type 1 ish where the slot is perpendicular to the crankshaft center line 9-3 and you set it to 10-4? Just trying to make sense of the mystery here.Oregon72 wrote:
A) Colin, I have the original VW 021-905-205E dizzy.
B) Not really making it to top speed like it feels like it could.
C) I am having a bit of a hard time getting the idle just right as well. So far, I've only messed with idle speed screw (the big one) - I'm scared of the mixture screws to tell you the truth.
D) There appears to be a little bit of an oil leak at the oil pressure relief valve. Not big enough to drip, but just a little bit wet there. I remember not using permatex 3H on this and now I regret it. You can see the oil forming at about the 9 o'clock position.
B) Don't even think of top speed and performance, don't even think of comparing it. You have new rings scraping along honed cylinder walls. Give it 1,000 miles to loosen up before any comparison to what you expect. The 1972 Type 4 bus with a clutch drop 2,500 rpm start and tortuous 18/38/59 shifts by a stupid car magazine is going to give you a 23 second 0-60 . . . broken in. Right now, you probably have less torque than a Type 1 bus and you are not likely to be utilizing the horsepower which only comes on further up in the ranges. We have 50-60 and 50-70 clock results here on the site, I keep forgetting where, where no shifting is required ( a good thing to get rid of abuse and variables in shifting behavior). You might want to compare results with that, and remember to do both directions and average them out.
C) After 100 miles or so, warm idling engine:
1. Remove retard hose from distributor (blocking the hose is not important).
2. Remove central idling solenoid wire.
You should have a similar idle to when you began, but now it is dual carbs only.
3. Remove vacuum hose from right air horn at thermovacuum switch (the one coming from the brake booster elbow) and have your finger tip poised to block and unblock the end of the hose.
4. Read the mixtures from the behavior of this hose when you take your finger half off the end of the hose.
a) idle goes down (lean)
b) idle remains the same or roughens a little with no loss of rpm (nice)
c) idle goes up (rich)
We want slightly lean and we want both carbs doing the same amount of work.
5) Remove the cutoff solenoid wire from left carb, read rpms, replace wire.
Remove cutoff solenoid from right carb, read rpms, replace wire.
Which carb is working less?
ex. if you removed the left wire and the rpms dropped to 450, then removed right wire and rpms were 500, that means the right carb is doing less work than the left carb.
With above example of idle drop numbers:
If 4a, richen right carb a tad (1/4 turn)
If 4b richen right carb and lean left carb equal amounts (1/8 ea)
If 4c lean left carb (1/4 turn)
When done, we want both carbs dropping an equal amount when you pull off the cutoff wires one at a time, and we want the vacuum hose-finger off test to give you a slight drop in rpms when you add air by removing your finger a bit from the end of the hose.
6) NOW put the central idling circuit wire back on and blip the throttle to kick the central idling circuit on. Put vacuum retard hose back on. Idle should settle down to about 950-1,000 rpm.
Put your finger on the vacuum hose end and when you roll it off the end of the hose, we would like the idle to go up a bit. Adjust the mixture screw on the central idling circuit (the little guy to the left of the intake on the left carb).
7) Final adjustment is the idle speed with all hoses on 1,050 during break-in and it may need to be turned down incrementially as the internal engine friction drops.
See how you don't want to do this when the engine needs to stay away from too much idling when brand new?
Colin
I'm going to have to get a little more seat time before I do this though. I think I'm at about 30 miles right now.
A trip to homedepot for an extension cord with my boy. Man it was cold tonight.
This worked so awesome!! I got an additional 2/3 of a turn tighter by doing this. I'll be keeping an eye on that spot to see if I've solved it.Amskeptic wrote:You can cinch the pressure relief screw right now. Get a big serious flat chisel or anything else big and bladed, and put the bottle jack under the screw with your bladed thing in the slot. Trap the chisel between the jack and the engine and jack it up a bit, then turn cw to tighten. Nothing crazy, just firm. Clean and dry the area.
Colin
The permatexed fuel pump dome cap is totally DRY with the remedy I did.
-'72 Westy-
-
Oregon72
- IAC Addict!
- Location: Sherwood, Oregon
- Status: Offline
-
dtrumbo
- IAC Addict!
- Location: Mill Creek, WA
- Status: Offline
Pssst! Troy! Hey buddy, your bus looks great, but, um, I hate to tell you, um, you forgot to put your bumper back on! By leaving it off you're betting you're going to have to remove the engine again, which ain't gonna happen! You nailed it, pal! Put the bumper back on, take it to the Lab and continue with your breaking in/dialing in. Well done, very well done! 
- Dick
1970 Transporter. 2015cc, dual Weber IDF 40's
1978 Riviera Camper. Bone stock GE 2.0L F.I.
1979 Super Beetle convertible.
... as it turns out, it was the coil!
1970 Transporter. 2015cc, dual Weber IDF 40's
1978 Riviera Camper. Bone stock GE 2.0L F.I.
1979 Super Beetle convertible.
... as it turns out, it was the coil!
-
bajaman72
- Addicted!
- Location: Quartz Hill, CA
- Contact:
- Status: Offline
-
fancy pants

- Old School!
- Location: Portland
- Contact:
- Status: Offline
Troy, that is a beautiful sound! Congrats!!!
I wasn't planning on hitting the lab tonight, but if you are going to make it with your bus, I will be there!
I wasn't planning on hitting the lab tonight, but if you are going to make it with your bus, I will be there!
John
76 Bus - Riviera
81 Mercedes 300TD
05 Golf TDI
Gone but not forgotten:
1972 Bus
1973 Squareback
We are not going to stick anything that dirty down in your hole - Colin, 6/30/2010
76 Bus - Riviera
81 Mercedes 300TD
05 Golf TDI
Gone but not forgotten:
1972 Bus
1973 Squareback
We are not going to stick anything that dirty down in your hole - Colin, 6/30/2010
-
Oregon72
- IAC Addict!
- Location: Sherwood, Oregon
- Status: Offline
John, I'm only going if you will be there so it looks like I'll see you this evening around 7-ish. Besides, I need to get a few more miles logged before I get jiggy with my carbsfancy pants wrote:Troy, that is a beautiful sound! Congrats!!!
I wasn't planning on hitting the lab tonight, but if you are going to make it with your bus, I will be there!
Westy78, I have your goodie bag of specialty tools I need to get back to you. Gypsie, I have your engine stand and ATV jack and can bring them back for you (perhaps it needs to go back to Hal?). I woulda been in a world of hurt without your generosity.
-'72 Westy-