First off, I apologize if this comes across negative. Hopefully this will help the next guy installing an awning or at least prepare them. That said, here you go.
I recently added an 8' F45 Fiamma awning to my bus. In researching for the mounting hardware, Fiamma apparently never made, or no longer makes the brackets for the bus. They do for the vanagon and other vehicles, just not the bus. GoWesty listed a bus mount, but when I first contacted them last Nov. they were not available. I inquired again in Feb. 2012, they were now available and I placed my order. When the brackets arrived I was surprised to see that these were not a Fiamma product, but actually a GoWesty fabricated bracket designed to fit the bus. The brackets are quit nicely built but are not cheap in my opinion, running about $89.00 plus shipping.
Being very excited to get started I preread the installation instruction for the brackets the evening before and on Saturday morning went to work. I was very impressed with how well the instructions read and in no time the brackets were installed and I was ready to hang the awning.
Once the brackets were mounted, I preread the awning instructions. The first thing that caught my attention in the awning manual were the three separate area's that indicated using the three mounting locations noted on the back of the awning with a sticker labeled "SUPPORT".
Page 3 "to receive the pulling force of the retractable arms, the brackets need to be fixed exactly behind the stickers SUPPORT which are on the awning. It is necessary that the brackets are fixed equidistant from one another."
Page 6 "When installing the awning, please make sure that the brackets are in correspondence with the sign "SUPPORT"".
and page8 "We recommend to use always the 3 brackets when installing the awning."
This is all in the Fiamma manual yet, GoWesty only supplies two brackets.
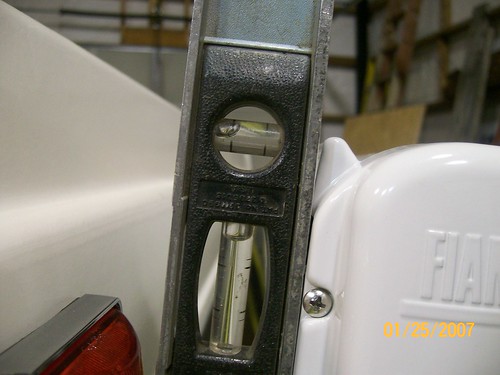
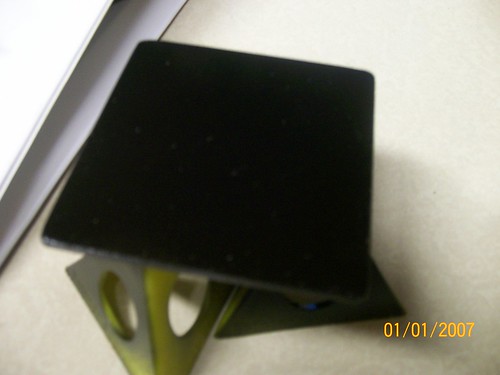
The second thing I ran into was, when I hung the awning on the top lip of the GoWesty bracket, the awning tipped downward. The "Z" bend is not tight and allows for an 1/8" gap.
See the gap between the back of the awning and the bracket
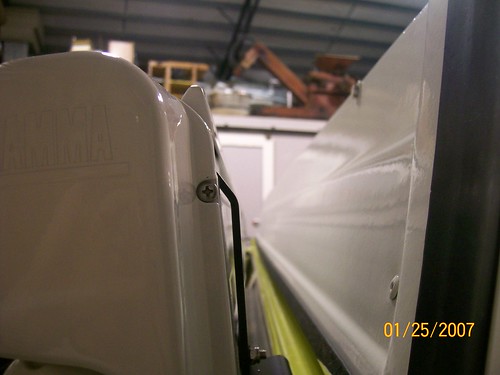
101_0179 by Mike P B, on Flickr
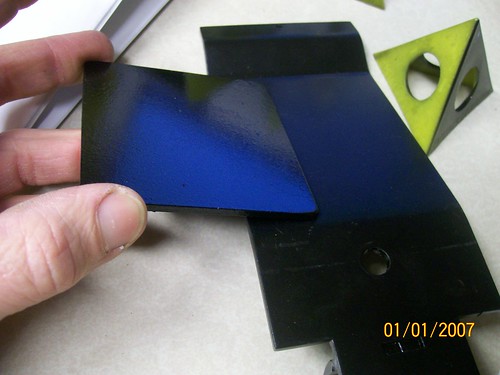
Here is a shot of the aluminum bracket supplied with the Fiamma awning along side the GoWesty bracket. Notice how much tighter the "Z" bend is.
101_0189 by Mike P B, on Flickr
With the tighter "Z" bend it fits snug against the back of the awning
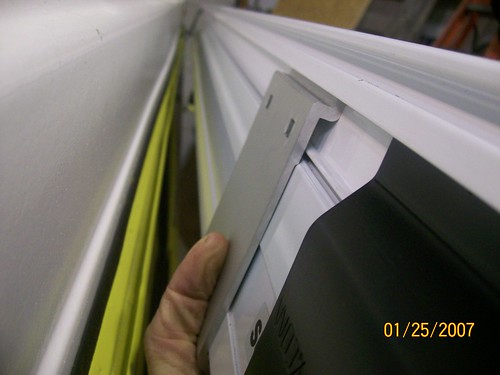
101_0180 by Mike P B, on Flickr
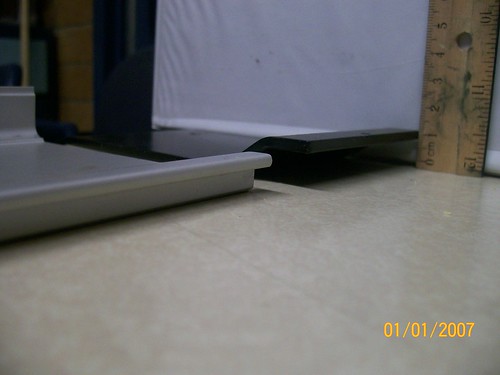
The third item was the bend in the bracket itself just above the rain gutter. It was at the wrong deg. also tilting the awning downward.
101_0187 by Mike P B, on Flickr
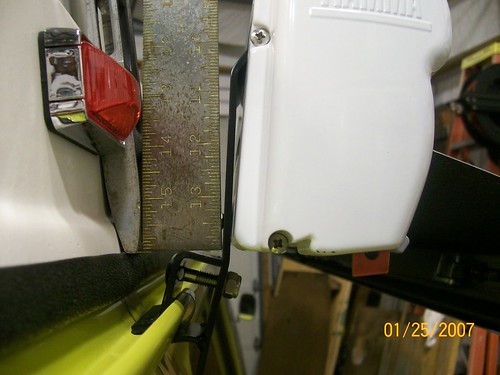
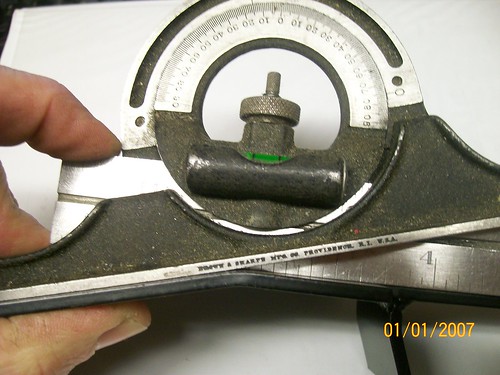
101_0185 by Mike P B, on Flickr
The straight edge is level with the shop floor.
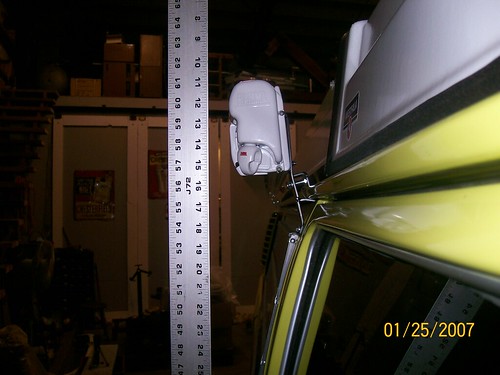
101_0171 by Mike P B, on Flickr
Between the top lip and the wrong angle deg. ,the awning dropped about 4" in height for every foot you extended it out. By the time you got out the 6 feet the bottom edge was at about a 4' height.
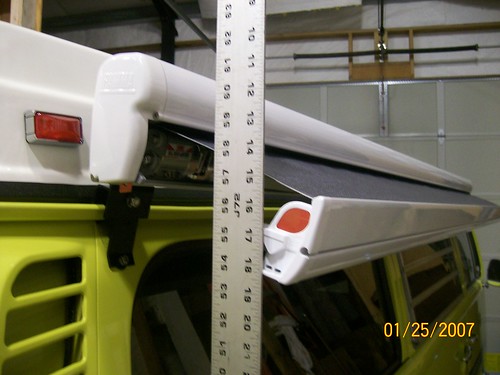
101_0177 by Mike P B, on Flickr
I first called GoWesty explaining what was going on and I was asked to take photo's and send them to Jesse at GoWesty which I did. Here is his response.
On all of the vehicles we tested the brackets on, the awning sat quite level and while there is no functional disadvantage to having the awning tilted a bit as it is, I can see why you would want to level it for aesthetic purposes. You can simply put a bit of an additional bend in the brackets to level your awning out. I will review the top lip of our brackets for fitment as they should be the same as all of our other brackets that we have been selling for many years with no fitment issues like this ever reported.
Cheers,
Jesse Hitchcock
GoWesty Camper Products
1119 Los Olivos Ave.
Los Osos, CA 93402
888.469.3789 x130
No functional disadvantage having the awning tilted? I disagree. When you have to duck and crawl around to get under the awning, I call that a disadvantage. I went ahead and removed the brackets and bent them to the proper deg. then fabricated a backing plate to go between the awning and their bracket itself. I sent them these pictures of what I found and of what work I went to making these brackets correct for me.
Here is the backing plate.
101_0195 by Mike P B, on Flickr
101_0197 by Mike P B, on Flickr
This is hard to see but I had to bend the angle from the factory that was found to be 13 deg. to a
15 1/2 deg angle. Not much but multiply that out over 6 feet and it adds up.
101_0192 by Mike P B, on Flickr
I also inquired about the highly suggested third bracket. Their response was,
Hi there, Mike,
First, let me say that I’m sorry you’re experiencing an issue with a GoWesty product. As Jesse explained, we’re always striving to deliver products that perform flawlessly.
We have tested those brackets on numerous Buses, with fantastic results—I mention this because it indicates that you might have an anomaly with your particular rain gutters. You should not have to bend the brackets to have them function properly.
In regard to the 3rd bracket: Typically speaking, you only need the third bracket if you do serious off-roading—and, even then, it is sometimes superfluous. I have taken my vehicle to some pretty remote (read: very tough terrain) places, and I only have two brackets. We do not offer a 3rd bracket option online, so you would not have been able to purchase that additional bracket using the 15% promo code.
If you’d like to purchase that additional bracket, however, I’ll certainly extend the 15% discount to you. Just let me know, and we’ll make it happen.
Sincerely,
Jad Josey
Sales Manager/Editor
GoWesty Camper Products
1119 Los Olivos Ave., Los Osos, CA 93402
888.469.3789 x-115
I went ahead and ordered the third bracket, and I appreciate that GoWesty was willing to sell it to me. The individual bracket even with the 15% promo code I used with my original order, that extra bracket ran $44.98 plus I had to pay an additional $11.64 for shipping. I guess I felt that after all the documentation, pictures, and additional time I had into correcting the brackets to make them right, their response would not have been,
We have tested those brackets on numerous Buses, with fantastic results—I mention this because it indicates that you might have an anomaly with your particular rain gutters.
I suppose I was looking for "Sorry for your troubles, we would be happy to send you a third bracket and no extra charge and we will look further into the issue you have experienced."
I would also like to mention that after removing the brackets from my restored 1975 bus I tried these brackets on another 1975 and a 1979 Westfalia and the results were the same. I guess all three of these busses have gutter anomalies.
The third bracket arrived and as I did with the other two this one needed to be placed in the sheet metal brake, bent and a 1/8th inch metal plate fabricated to take up the space. I'd like to point out that should you want to add the third bracket on the piller behind the slider door, do not center it. there is some reinforcing metal inside that you will run into. You need to place the bracket as far forward as you can and still clear the slider.
I will take some additional photo's to share showing the middle support.
This has been a costly and timely adventure.
Hope I have not come across to negative and, so far I love the Fiamma.
Mike