IAC in IA
Posted: Sun Jul 03, 2011 1:39 am
Colin actually showed up the day before to try to adjust the BobD engine's "at rest position. That was way cool because we had some extra time to visit.
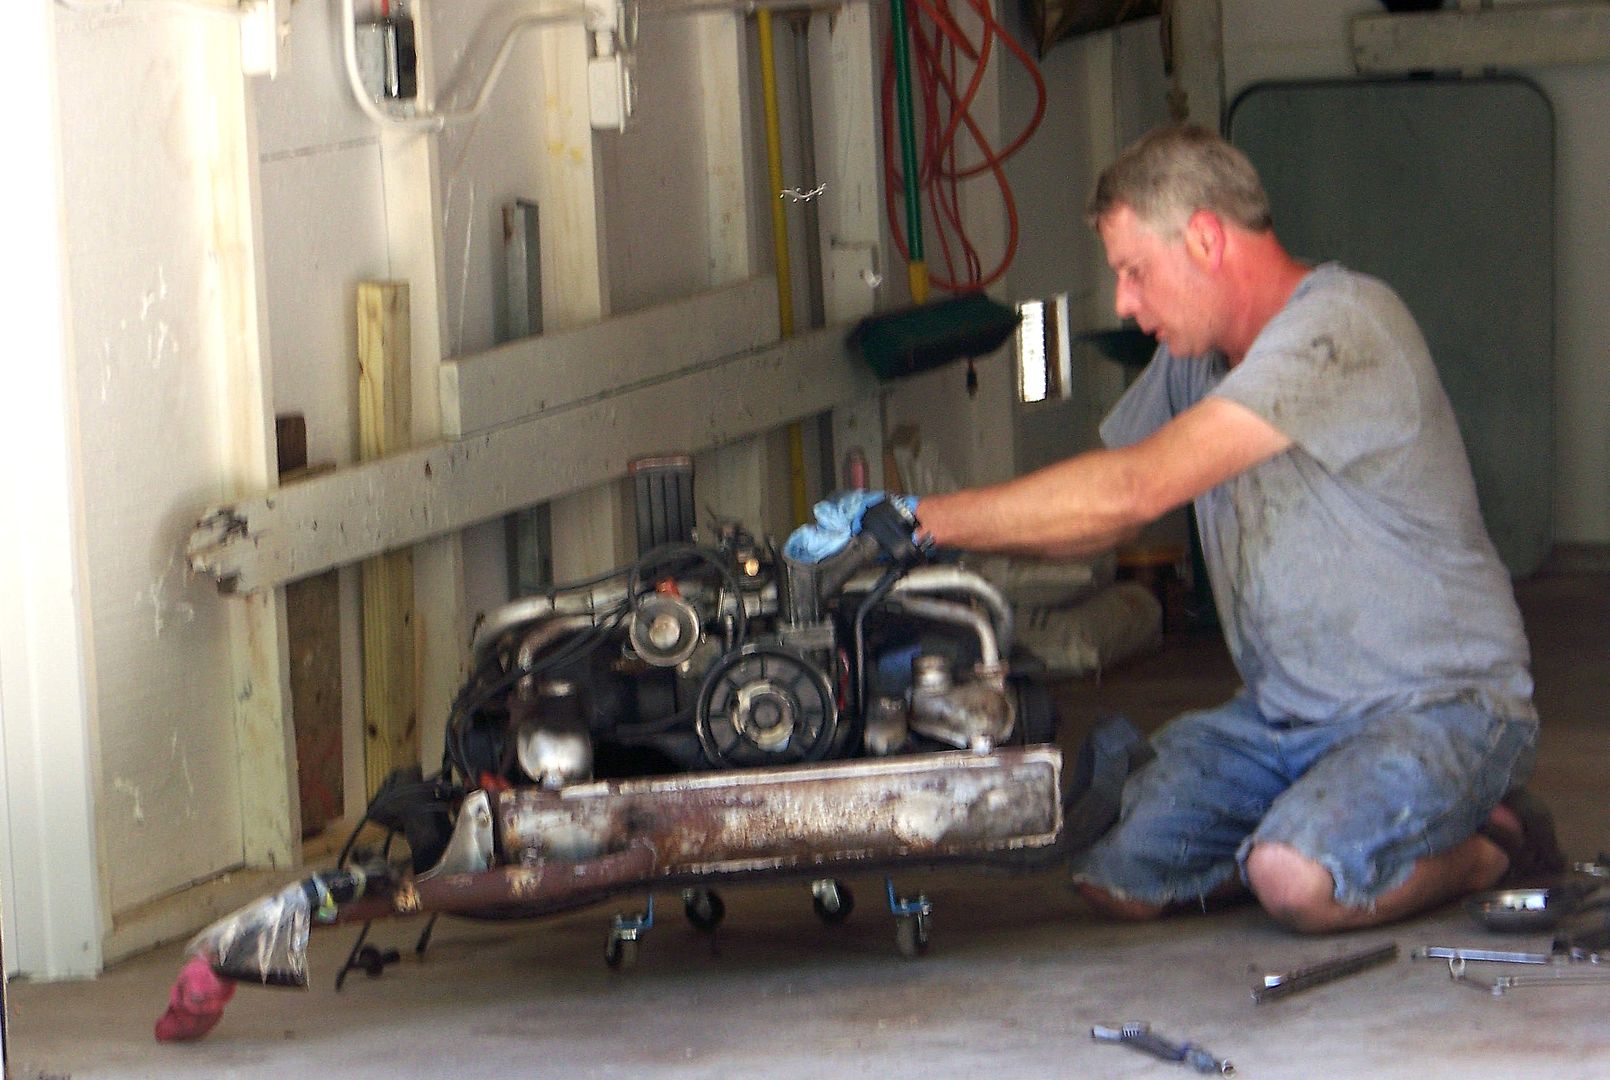
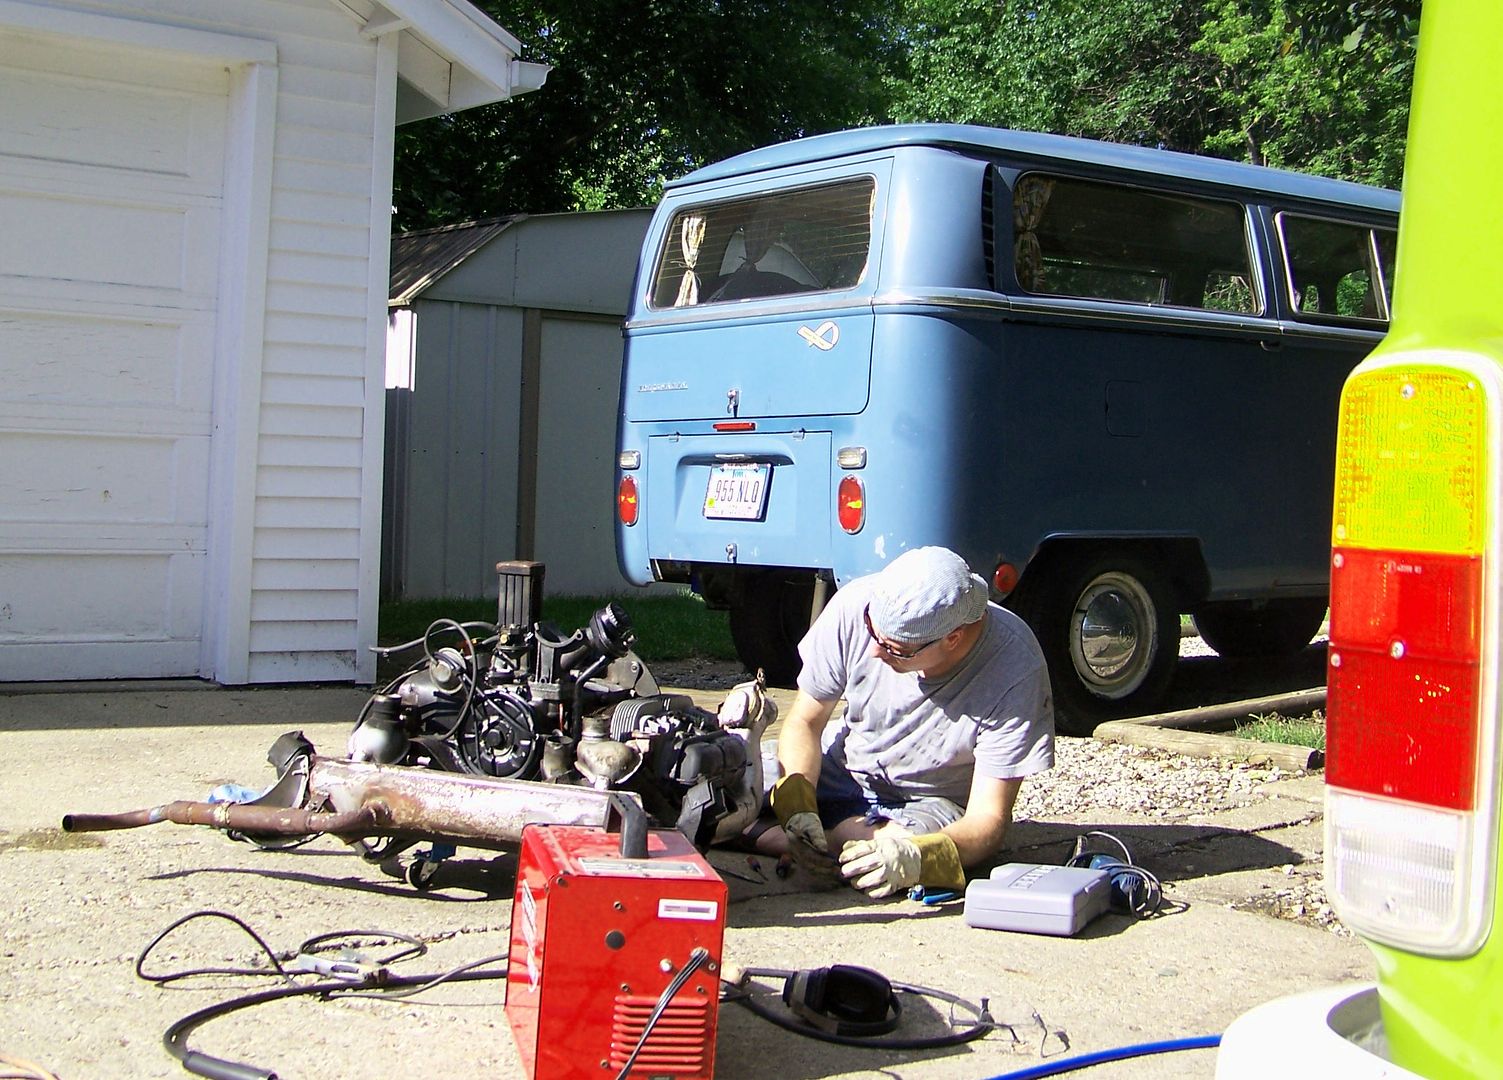
I had my engine out because I blew a spark plug out of cylinder #1 the previous Friday, so I was still diddling with that...and my heater boxes. I had to re-weld the little flappers onto the shafts so I can regulate the heat again. I already had an oversize spark plug insert and tap ordered but they weren't there yet on IAC day. That plug had been repaired before and was already tapped oversize in the cylinder head, so it makes for a tricky repair. Anyway I ended up pulling the cylinder head and found cracks, so I ordered a new, rebuilt head. Single port 1600 heads are no longer available new, AFAIK.
But I digress.
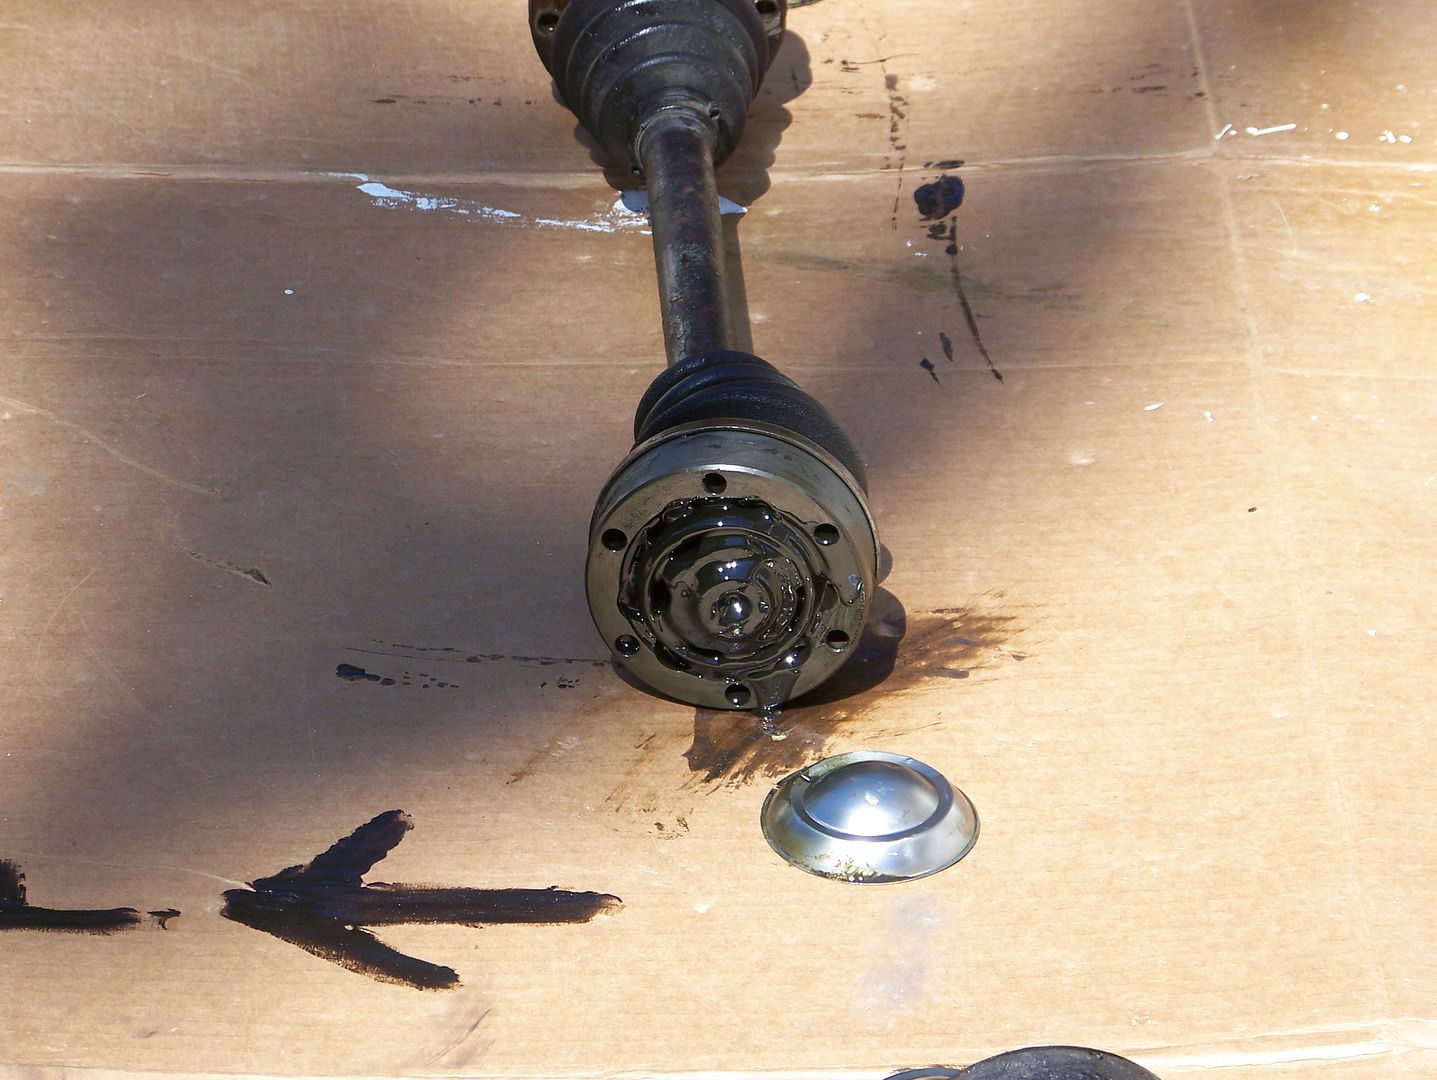
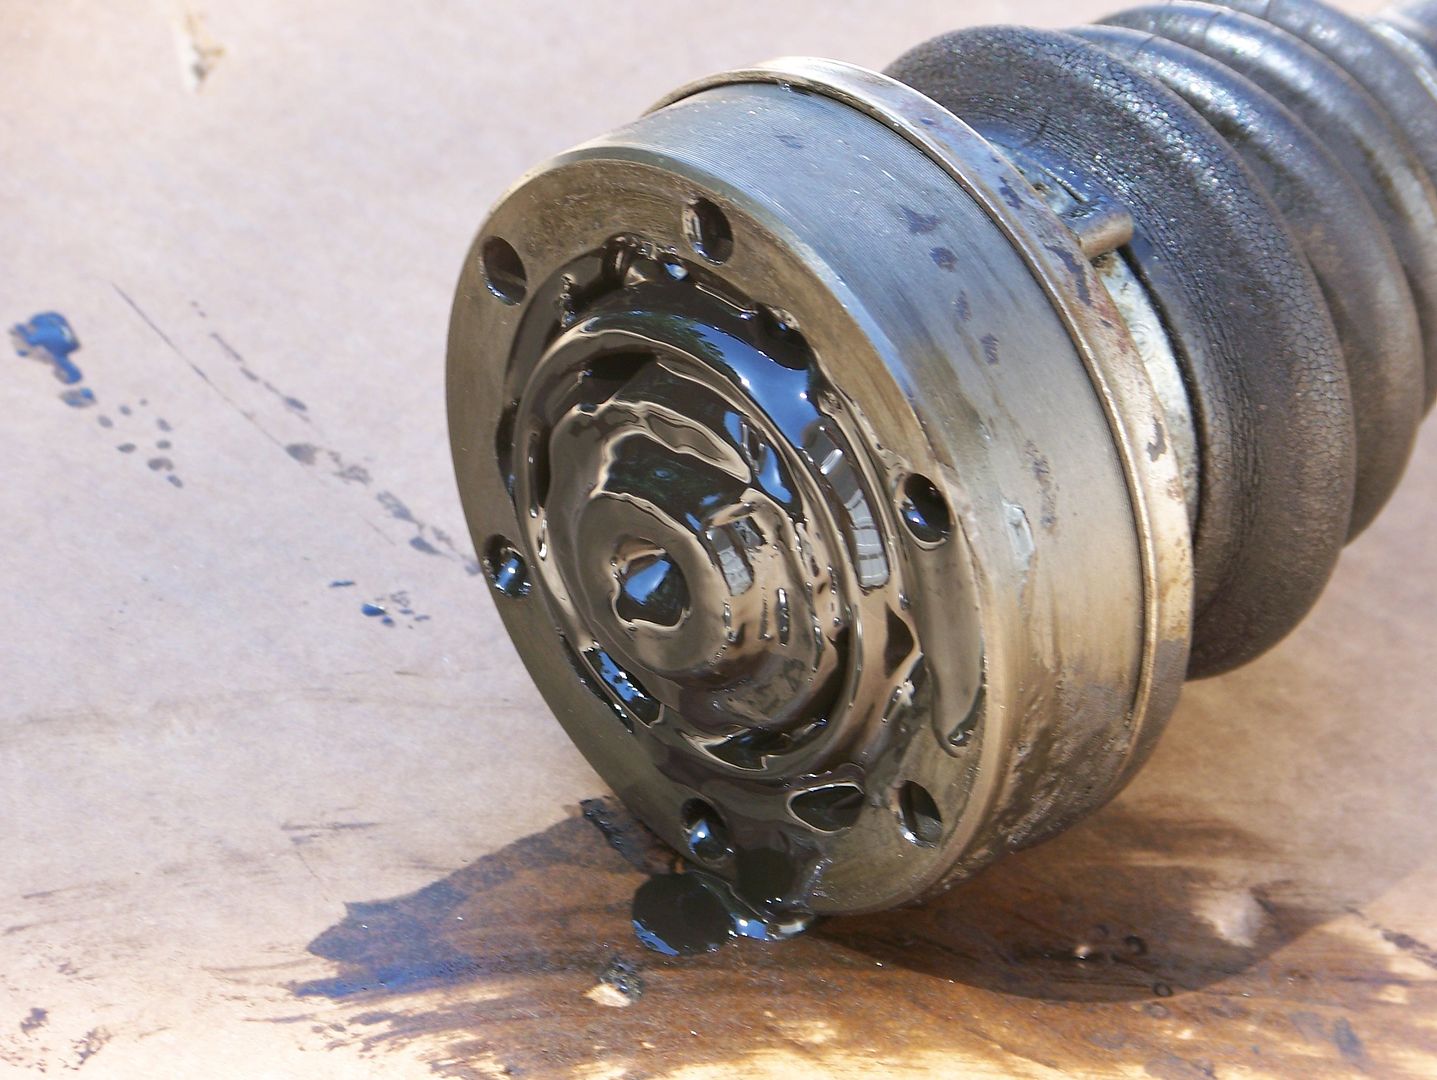
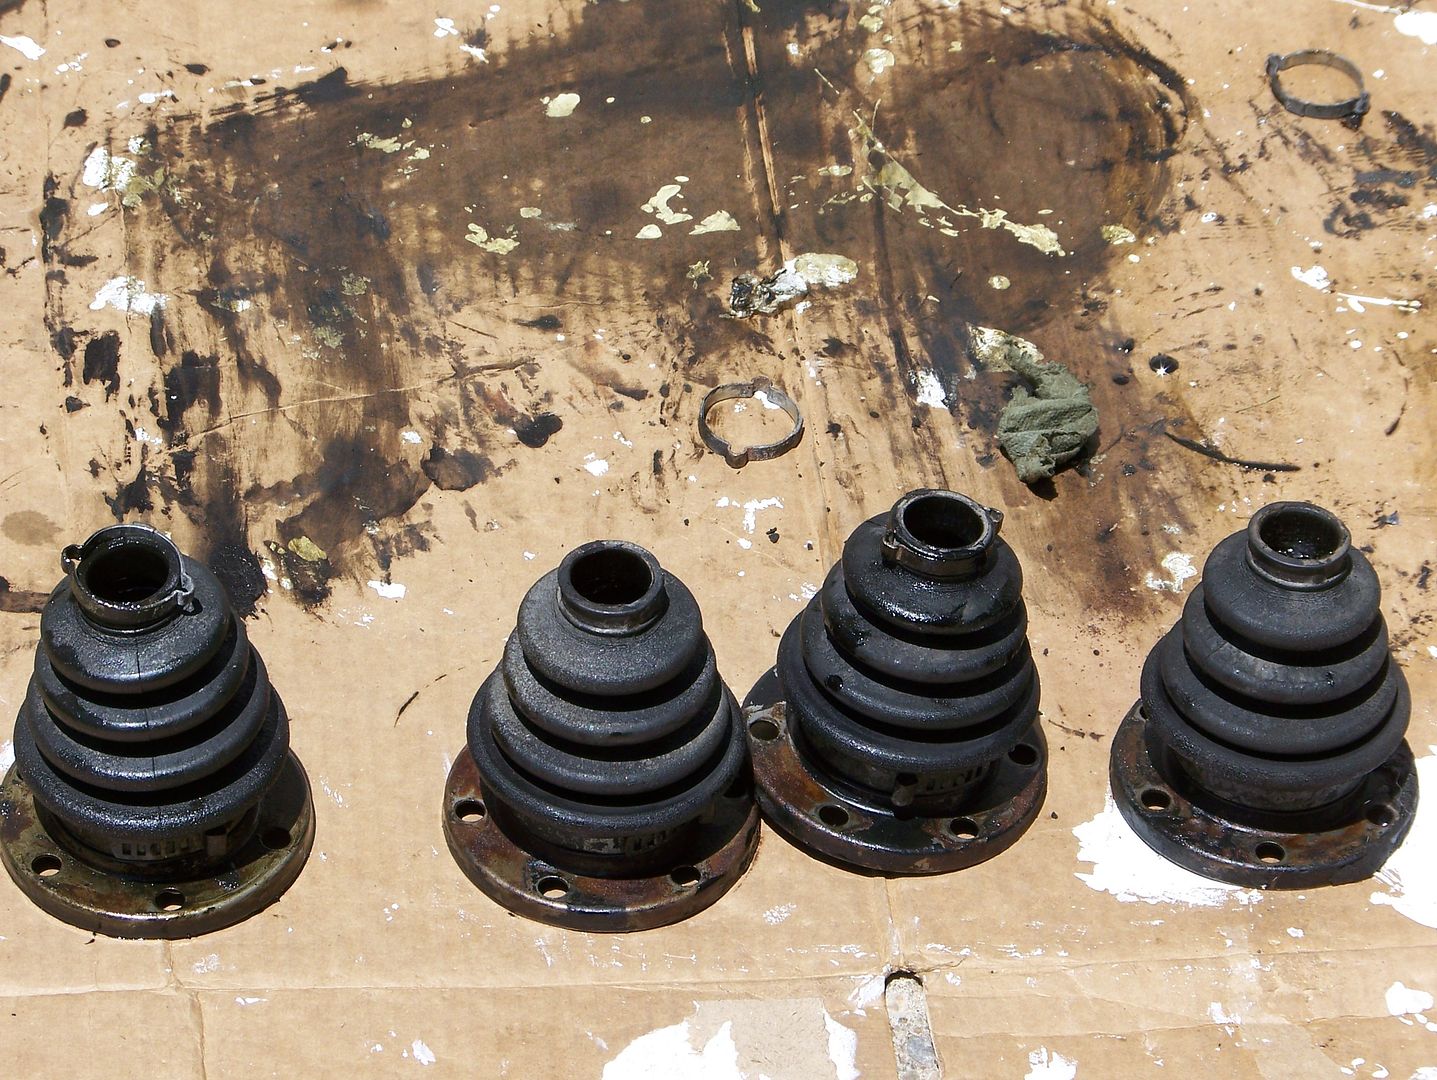
We stuck to the original plan of repacking the CV joints with grease and putting on new rubber boots and clamps. That stuff I did have on hand already. That was a greasy-ass job, but not too difficult, technically, once shown how. Boy, I was glad to be shown how the first time or I would have screwed something up. We very carefully made noted of bevel directions on the cage part of the CVs and all pieces so we could get them back exactly right. Also, there is a bit of an art to getting the little ball bearing type balls in and out. It took me forever the first one, but the second was much easier.
The new boots are also a bit of a squeeze, and the shaft needs some grease on it so they can be worked on over the hills and dales of the axle shafts. A small screwdriver to work around under the leading lip of the boot helps get it over the first edge of the axle shaft.
The old boots might have been original. Cracked but not cracked through. They were holding grease and keeping out water and dirt just fine. The old grease had kind of liquefied into something between grease and gear lube though. The CV joint parts cleaned up nicely for me in some Super Clean® followed by a hot water rinse, but Colin stuck to the old-school pail o’ gasoline.
I have nice balls. Anyway my balls aren’t blue.
Blue indicates heat discoloration, so you definitely do not want to have a case of the blue balls. My CVs actually showed little wear anywhere, so we packed them up with grease and put the axles back in such a way that the forward thrust surfaces will be the old reverse surfaces, so they are basically like running new CVs. Colin has pictures, and hopefully will post them up here.
That took up most of the day, and was worth it because now I know what I got back there. You know if any one of the four comes apart on the road, you ain’t going anywhere without a tow truck.
Then we got out my Horrible Freight dial gauge and spent some time setting endplay from about .006” back to .003”. We still had a little time to look at my rats’ nest turn signal wiring, but I was pooped out by then. We didn’t do dinner on the second evening because he needed to fly, and neither of us were hungry after working in the sun all day.
I had my engine out because I blew a spark plug out of cylinder #1 the previous Friday, so I was still diddling with that...and my heater boxes. I had to re-weld the little flappers onto the shafts so I can regulate the heat again. I already had an oversize spark plug insert and tap ordered but they weren't there yet on IAC day. That plug had been repaired before and was already tapped oversize in the cylinder head, so it makes for a tricky repair. Anyway I ended up pulling the cylinder head and found cracks, so I ordered a new, rebuilt head. Single port 1600 heads are no longer available new, AFAIK.
But I digress.
We stuck to the original plan of repacking the CV joints with grease and putting on new rubber boots and clamps. That stuff I did have on hand already. That was a greasy-ass job, but not too difficult, technically, once shown how. Boy, I was glad to be shown how the first time or I would have screwed something up. We very carefully made noted of bevel directions on the cage part of the CVs and all pieces so we could get them back exactly right. Also, there is a bit of an art to getting the little ball bearing type balls in and out. It took me forever the first one, but the second was much easier.
The new boots are also a bit of a squeeze, and the shaft needs some grease on it so they can be worked on over the hills and dales of the axle shafts. A small screwdriver to work around under the leading lip of the boot helps get it over the first edge of the axle shaft.
The old boots might have been original. Cracked but not cracked through. They were holding grease and keeping out water and dirt just fine. The old grease had kind of liquefied into something between grease and gear lube though. The CV joint parts cleaned up nicely for me in some Super Clean® followed by a hot water rinse, but Colin stuck to the old-school pail o’ gasoline.
I have nice balls. Anyway my balls aren’t blue.
Blue indicates heat discoloration, so you definitely do not want to have a case of the blue balls. My CVs actually showed little wear anywhere, so we packed them up with grease and put the axles back in such a way that the forward thrust surfaces will be the old reverse surfaces, so they are basically like running new CVs. Colin has pictures, and hopefully will post them up here.
That took up most of the day, and was worth it because now I know what I got back there. You know if any one of the four comes apart on the road, you ain’t going anywhere without a tow truck.
Then we got out my Horrible Freight dial gauge and spent some time setting endplay from about .006” back to .003”. We still had a little time to look at my rats’ nest turn signal wiring, but I was pooped out by then. We didn’t do dinner on the second evening because he needed to fly, and neither of us were hungry after working in the sun all day.