
Oregon72,
I'll look that thread up.
Thanks
Mike
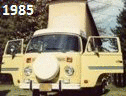
I just bought my first Westfalia, again!
-
Mike Boell
- Old School!
- Status: Offline
-
Mike Boell
- Old School!
- Status: Offline
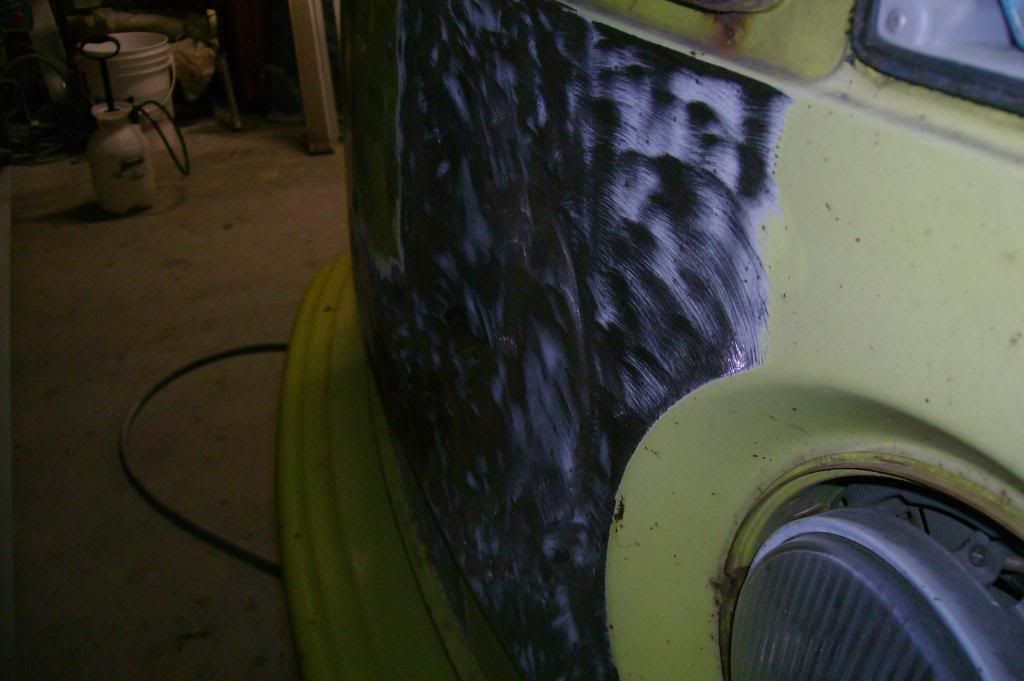
Body work
This work was done April 3rd / 4th.
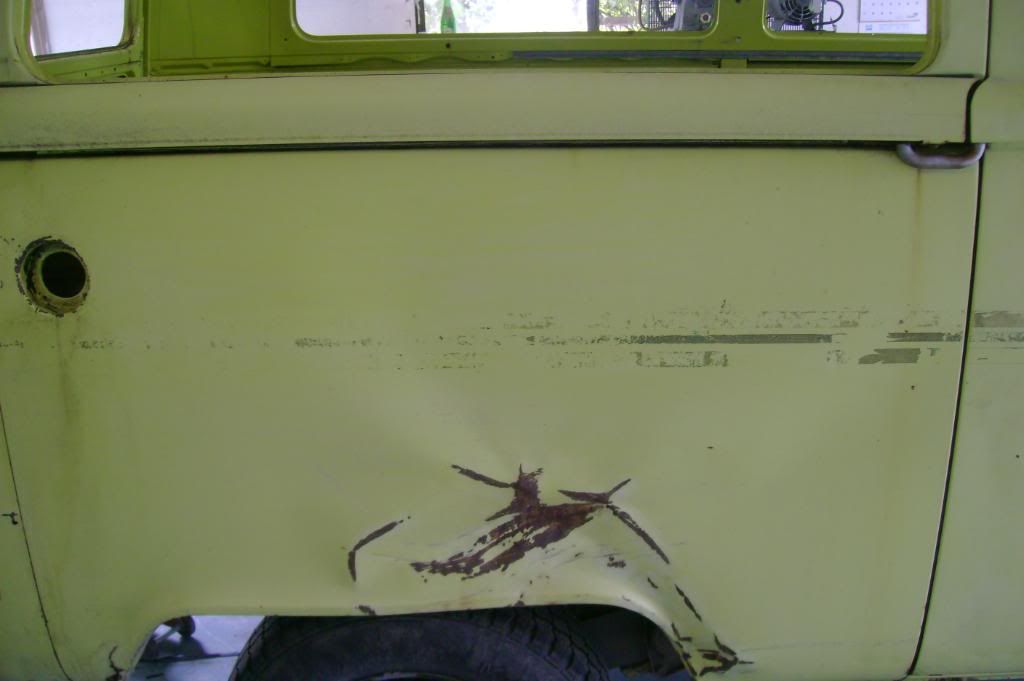
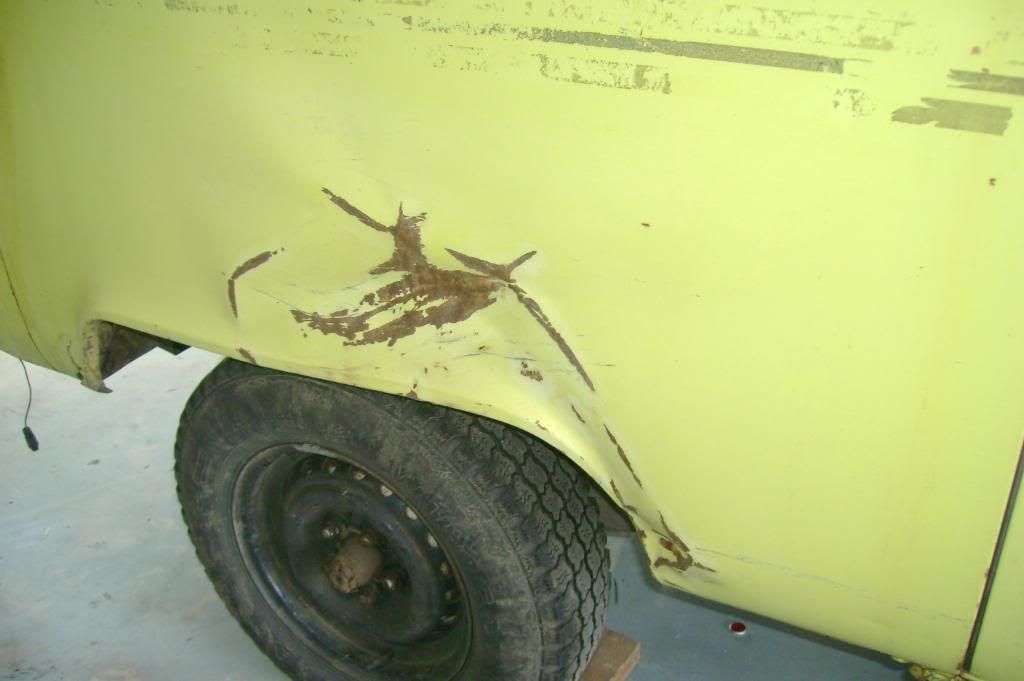
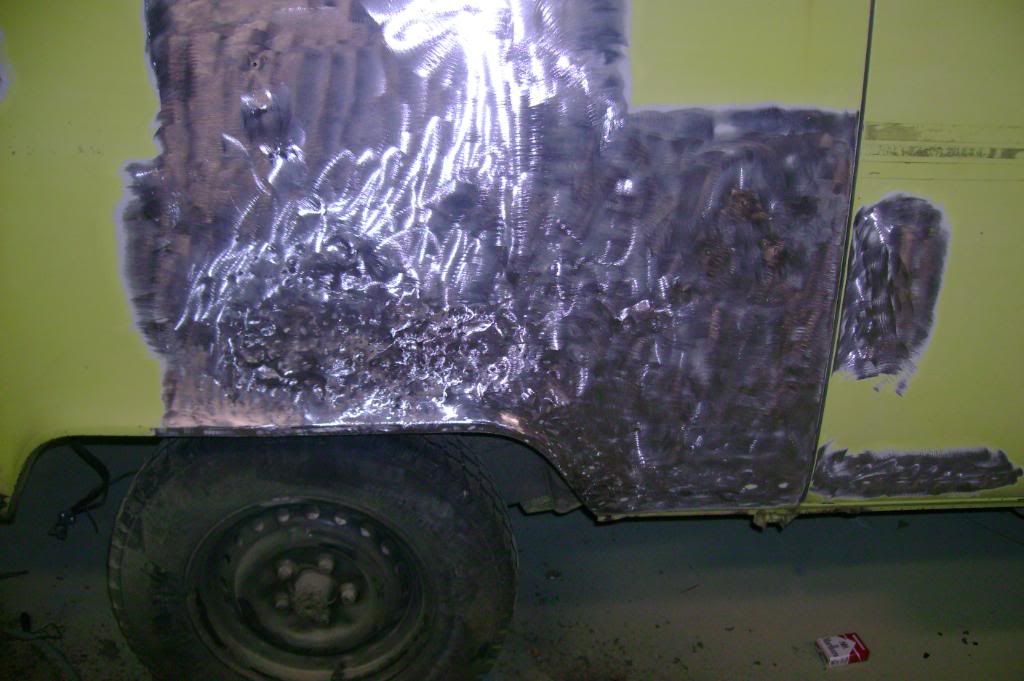
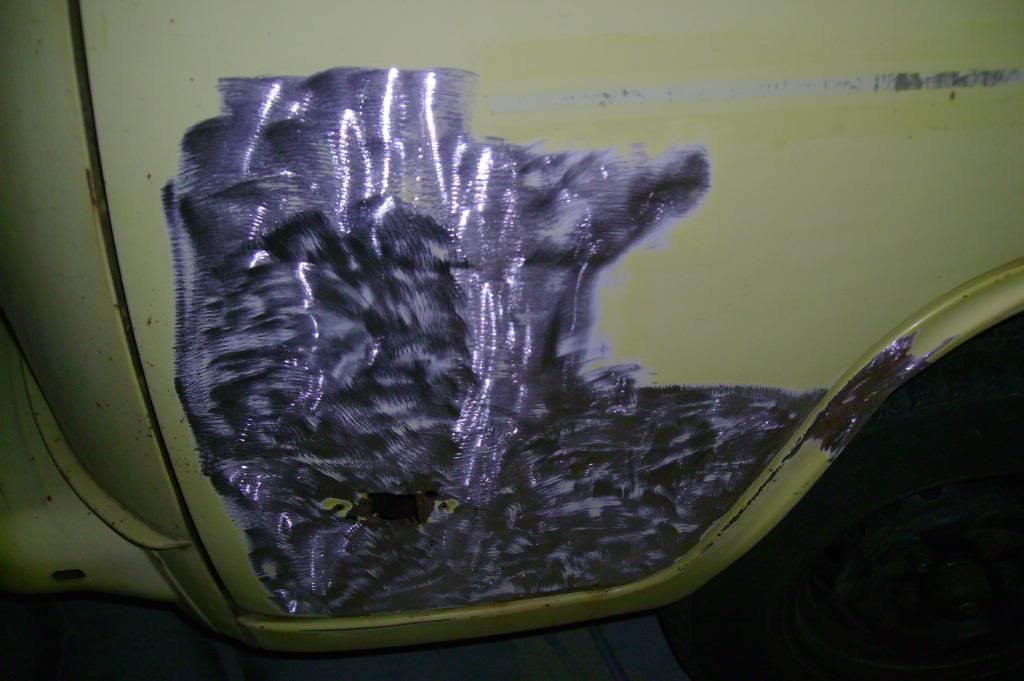
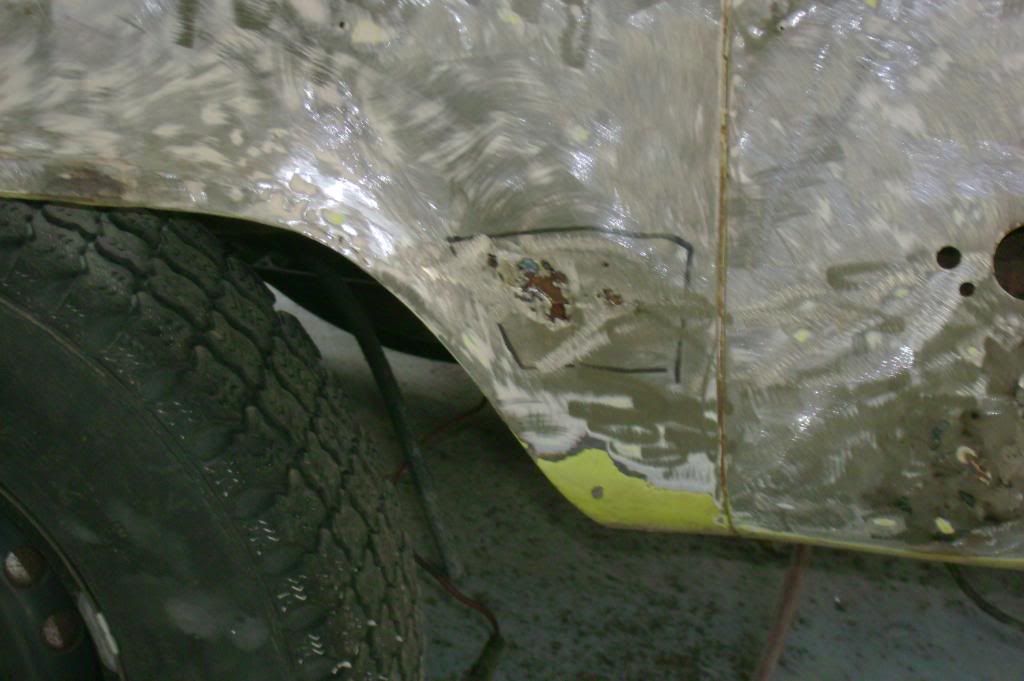
So this bad dent behind the slider door started like this.
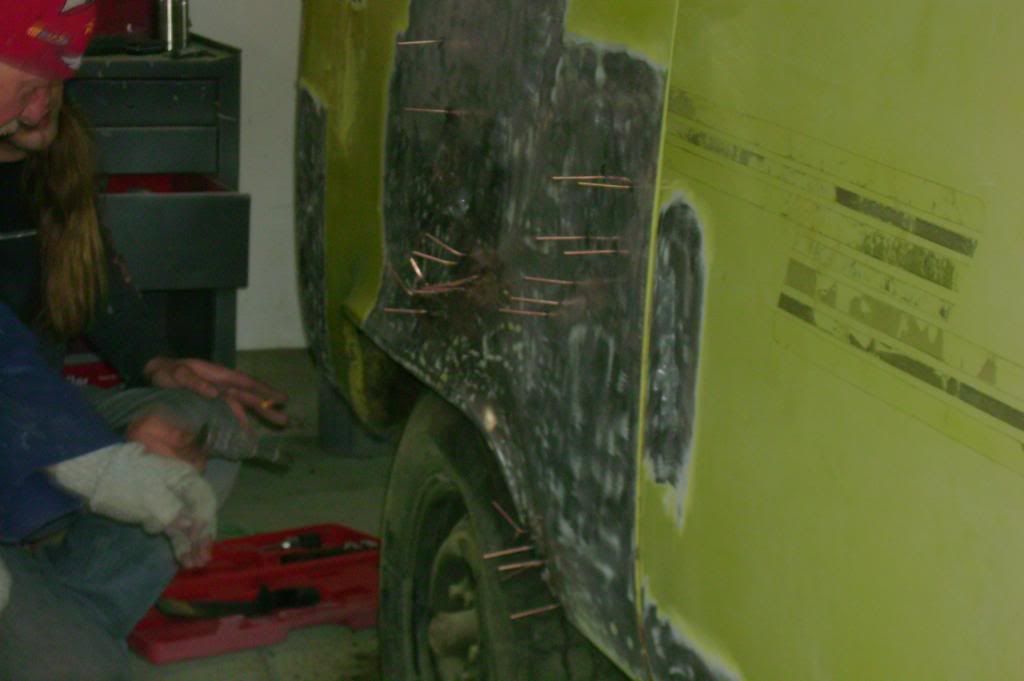
Now looks like this


Nice work Willy!
So this bad dent behind the slider door started like this.
Now looks like this
Nice work Willy!
Mike Boell
1975 FI Westy
Oregon City
SOME PEOPLE ARE LIKE SLINKIES - NOT REALLY GOOD FOR ANYTHING BUT THEY BRING A SMILE TO YOUR FACE WHEN THEY'RE PUSHED DOWN THE STAIRS.
1975 FI Westy
Oregon City
SOME PEOPLE ARE LIKE SLINKIES - NOT REALLY GOOD FOR ANYTHING BUT THEY BRING A SMILE TO YOUR FACE WHEN THEY'RE PUSHED DOWN THE STAIRS.
-
Mike Boell
- Old School!
- Status: Offline
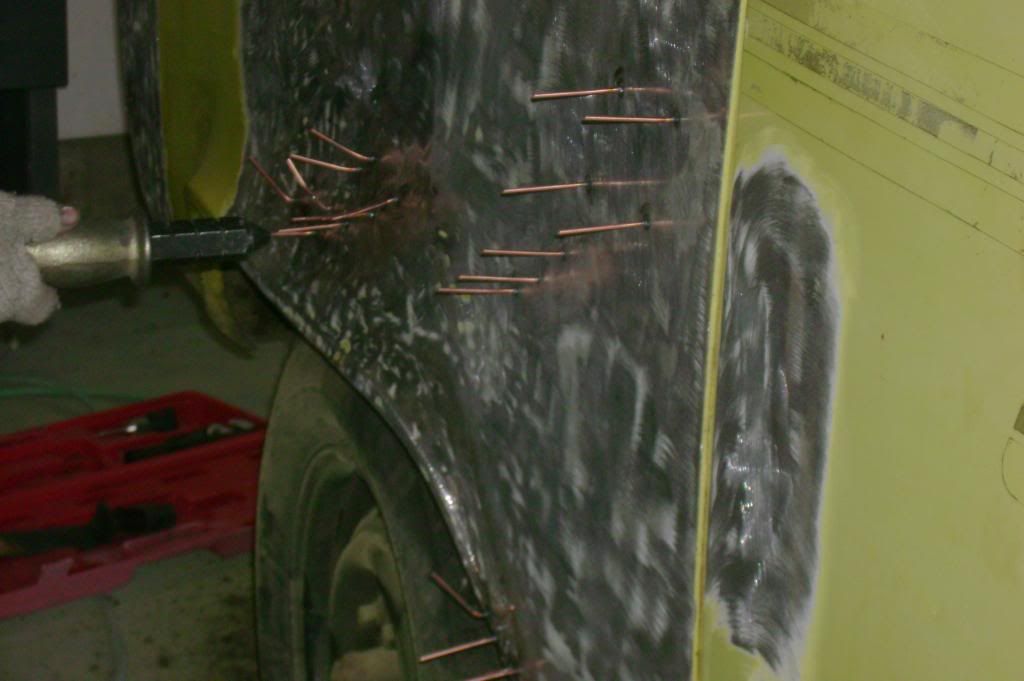
More body work
Here are some other area's they worked on a week ago.
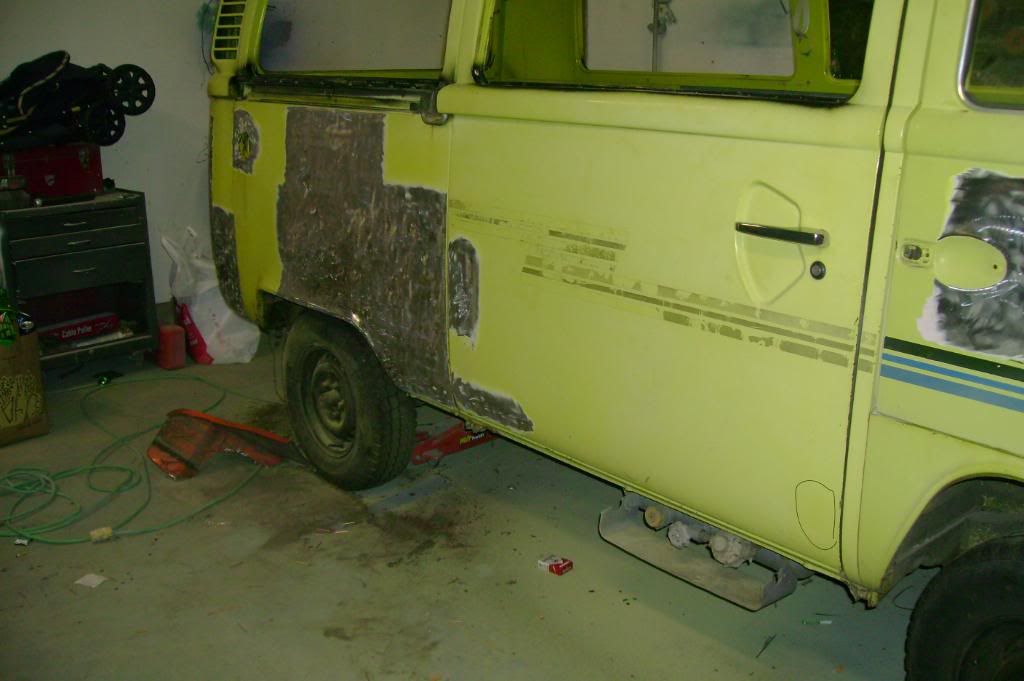
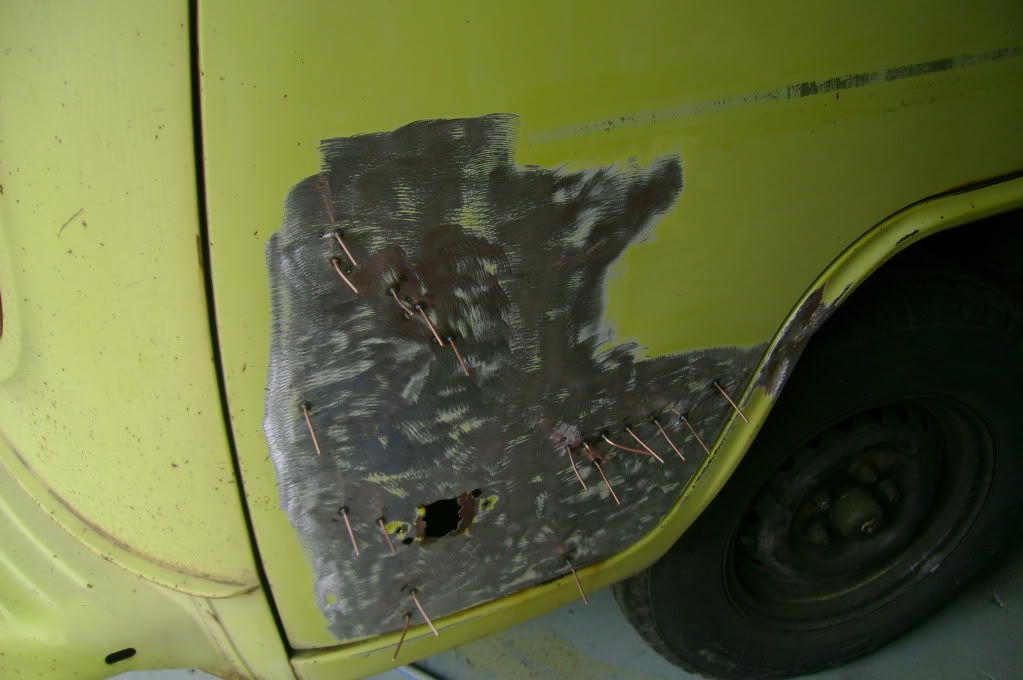
Bondo in the lower passenger door.
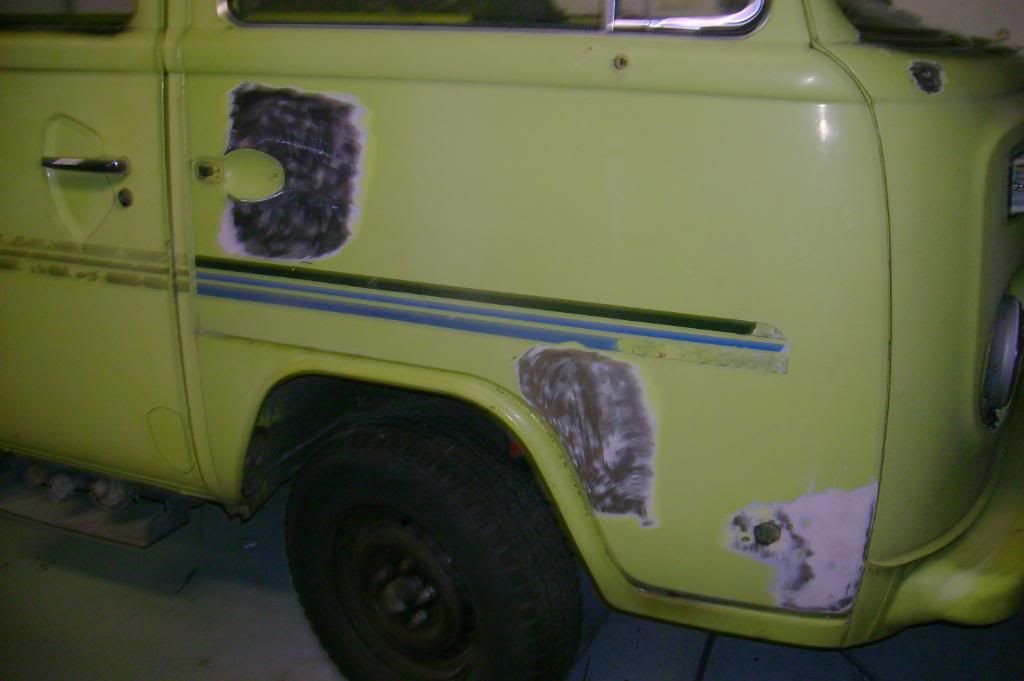
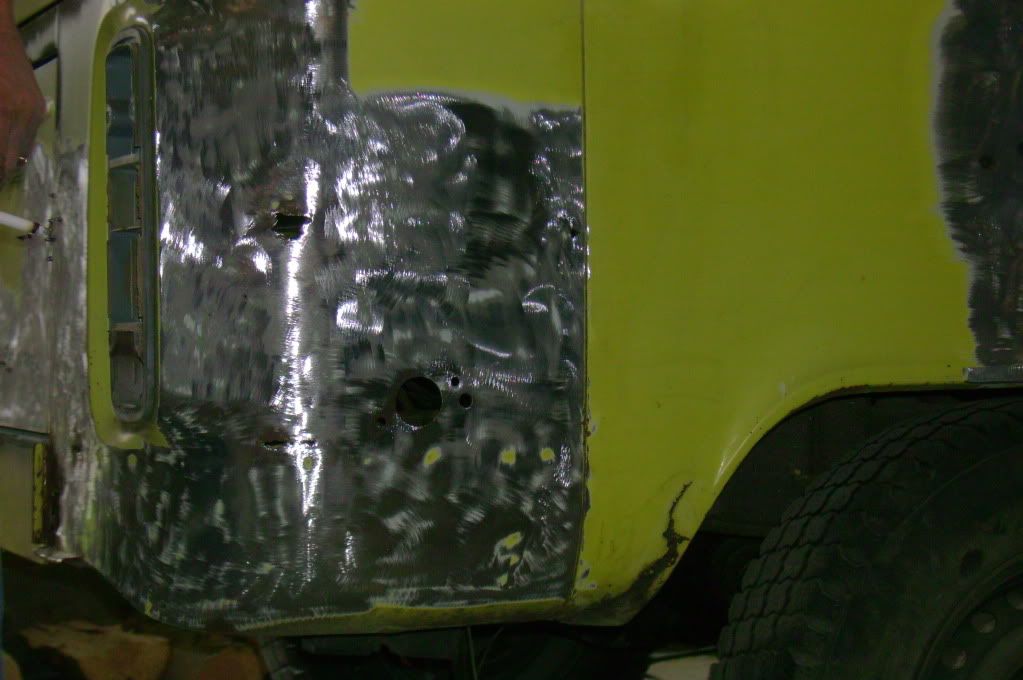
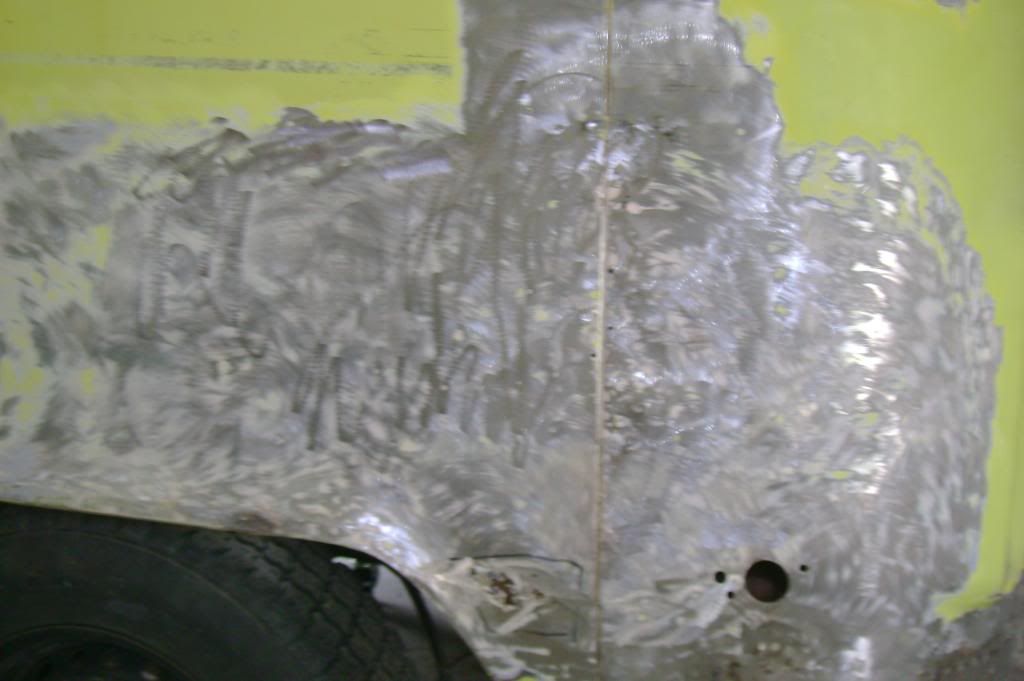
A whole mess of bondo discovered in the left rear quarter panel.
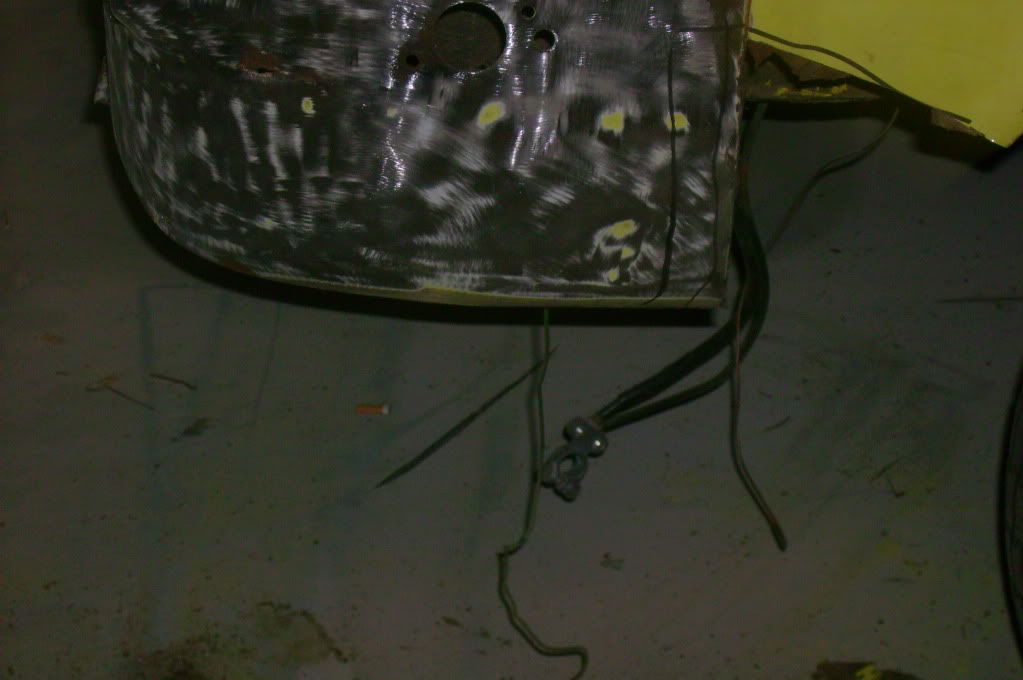
Battery box rust. Will be welding in some patch pieces.
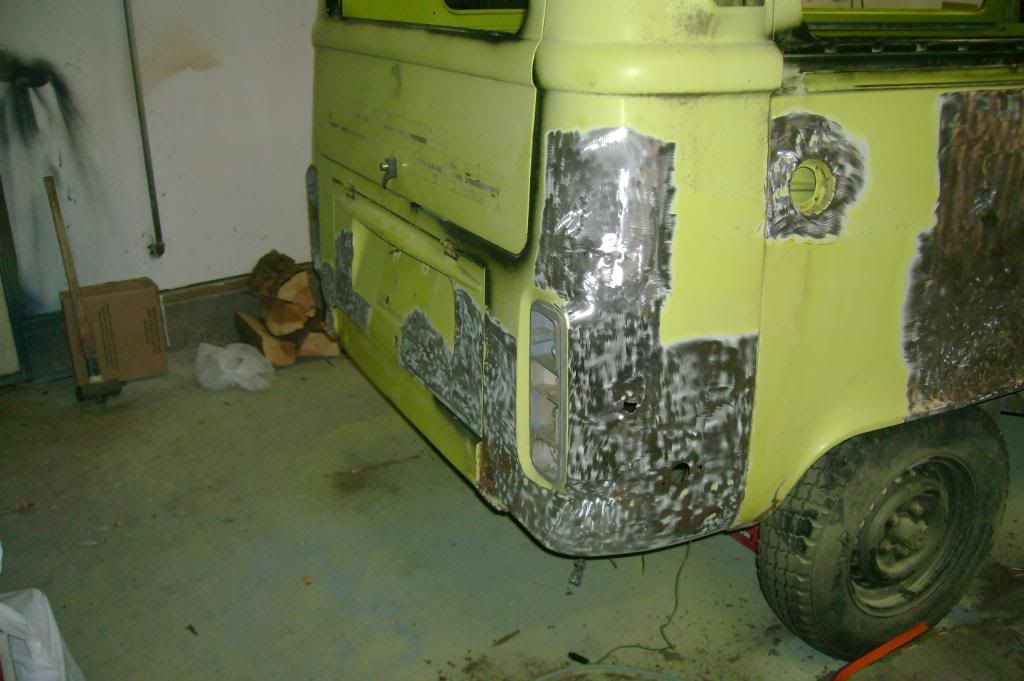
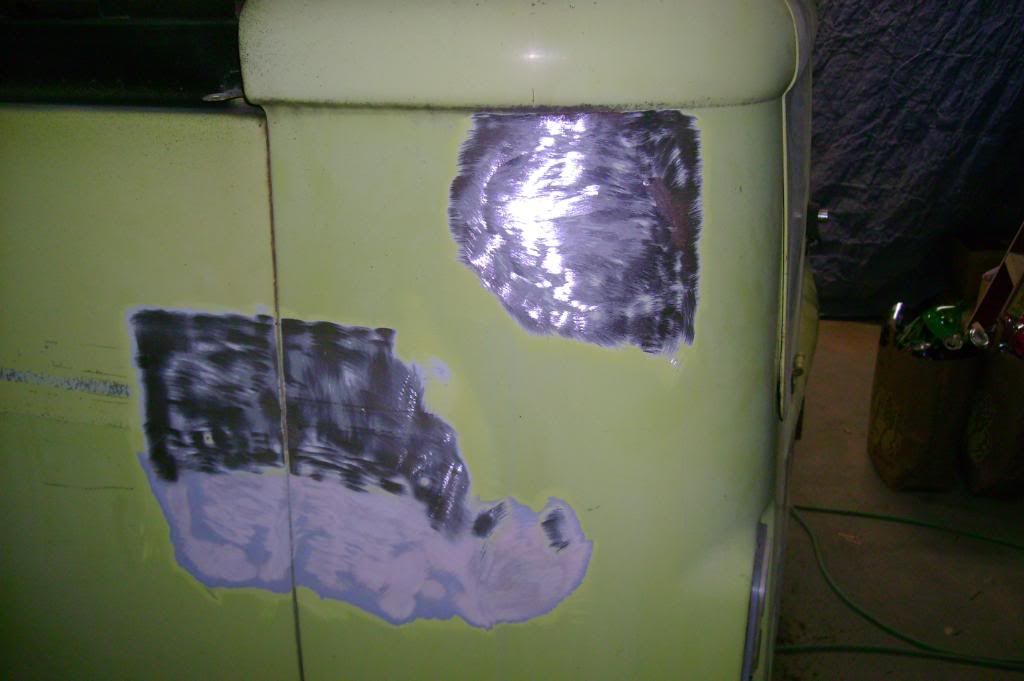
Engine lid dings, dents, and rust.

Drivers front door repair.
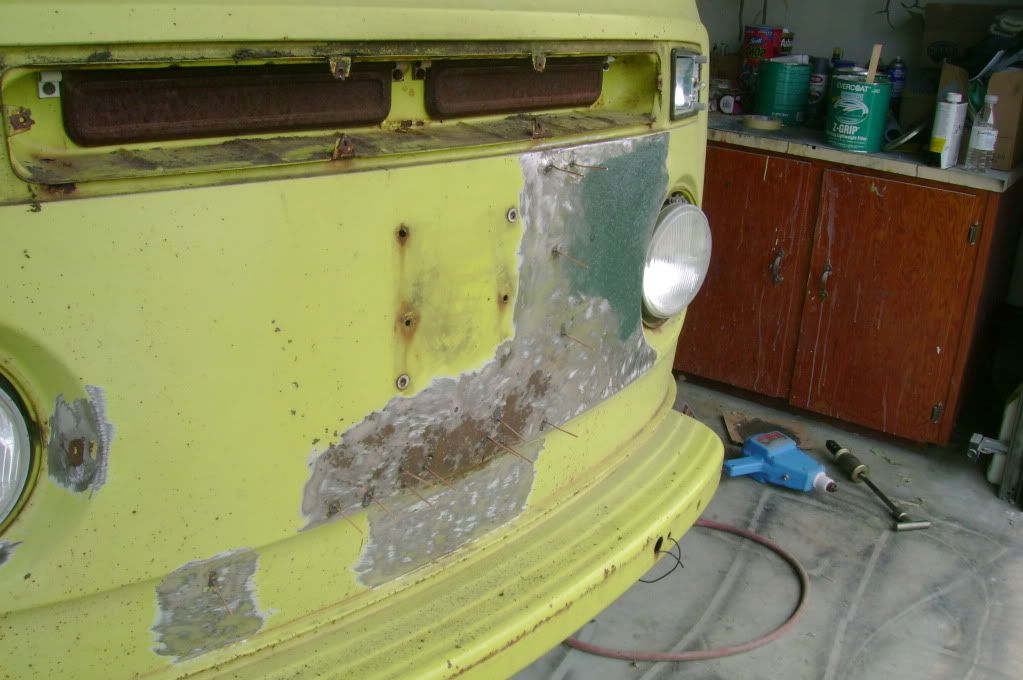
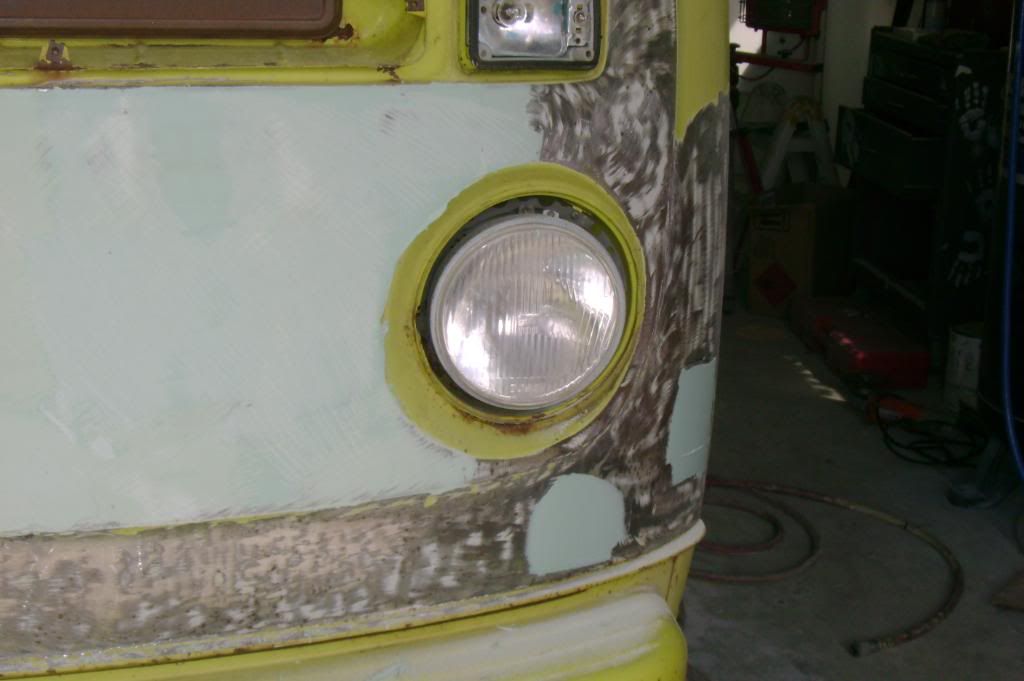
Working on the nose.
Bondo in the lower passenger door.
A whole mess of bondo discovered in the left rear quarter panel.
Battery box rust. Will be welding in some patch pieces.
Engine lid dings, dents, and rust.
Drivers front door repair.
Working on the nose.
Mike Boell
1975 FI Westy
Oregon City
SOME PEOPLE ARE LIKE SLINKIES - NOT REALLY GOOD FOR ANYTHING BUT THEY BRING A SMILE TO YOUR FACE WHEN THEY'RE PUSHED DOWN THE STAIRS.
1975 FI Westy
Oregon City
SOME PEOPLE ARE LIKE SLINKIES - NOT REALLY GOOD FOR ANYTHING BUT THEY BRING A SMILE TO YOUR FACE WHEN THEY'RE PUSHED DOWN THE STAIRS.
-
fancy pants

- Old School!
- Location: Portland
- Contact:
- Status: Offline
-
Mike Boell
- Old School!
- Status: Offline
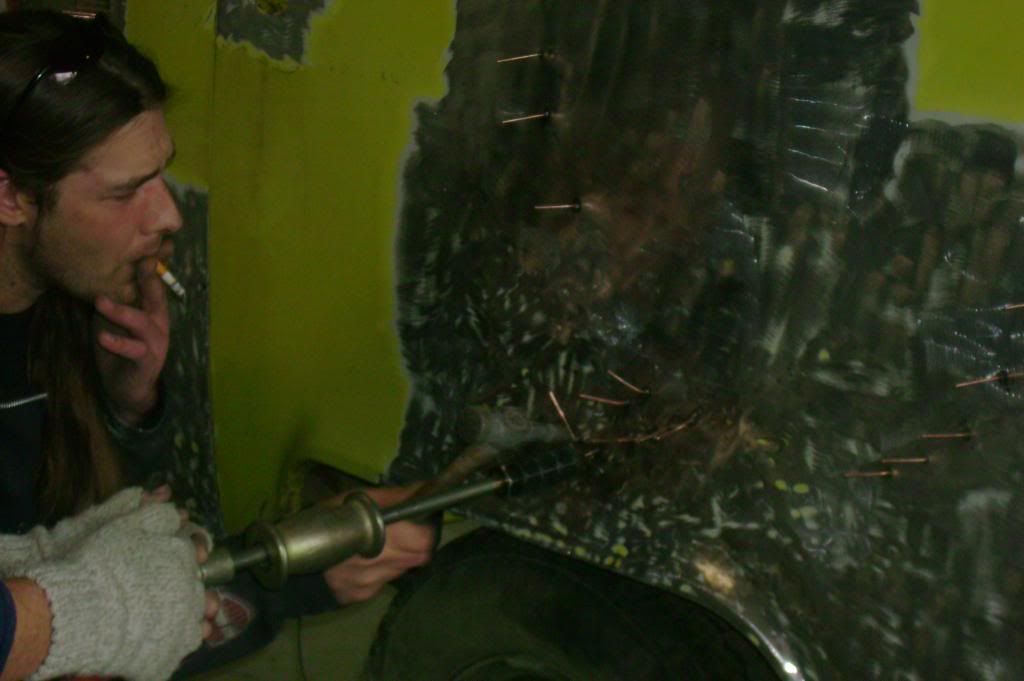
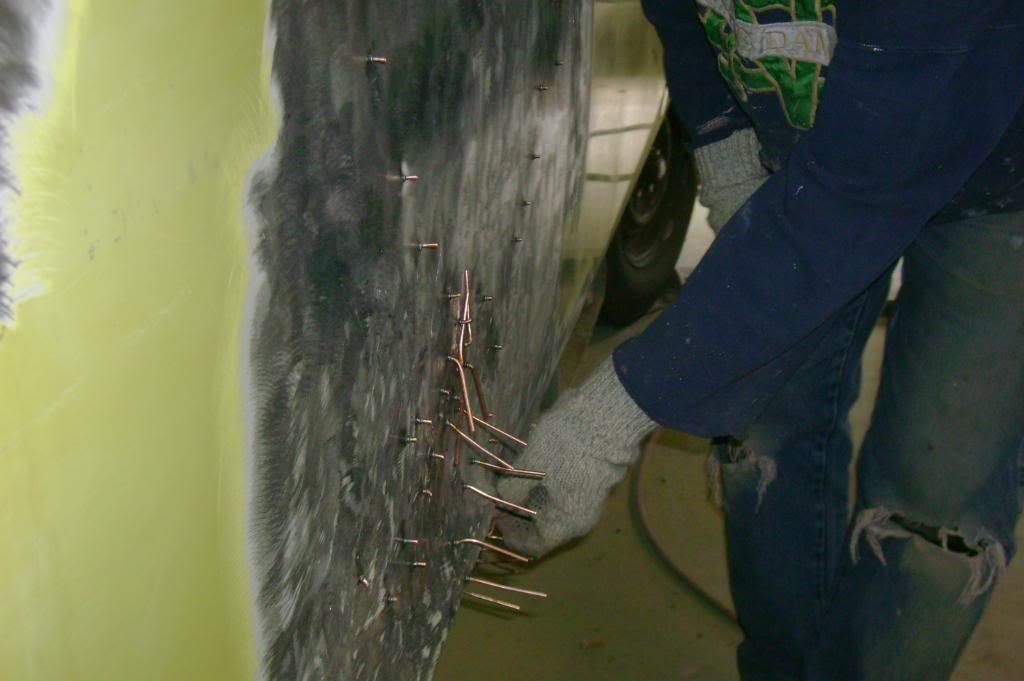
body work
Pics from April 10 / 11th.
I got in on the act by grinding away at a previous repair.
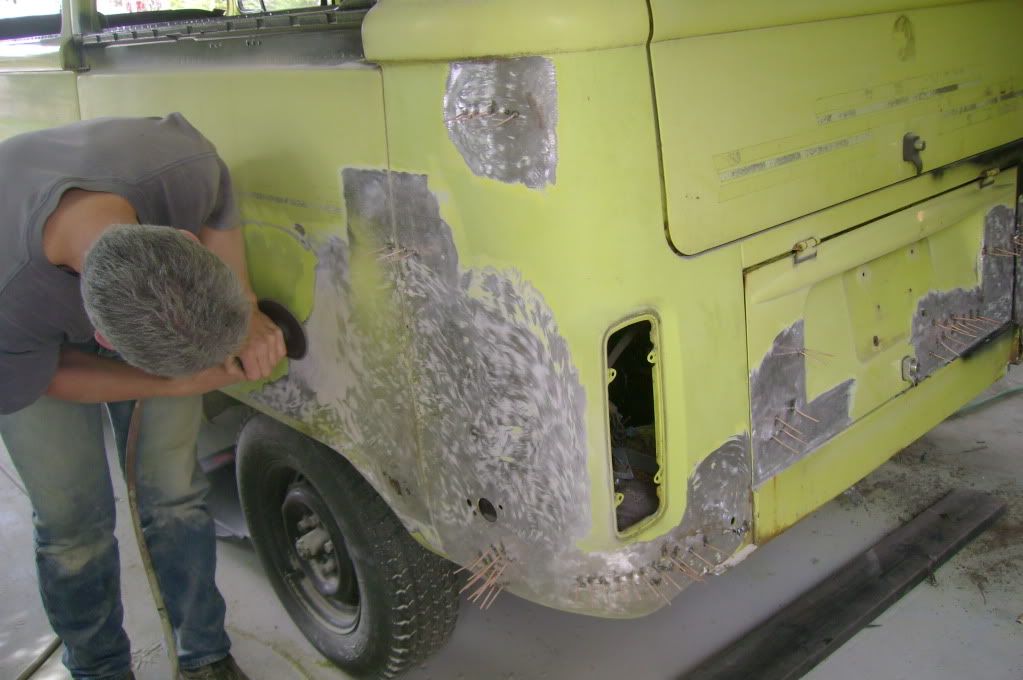
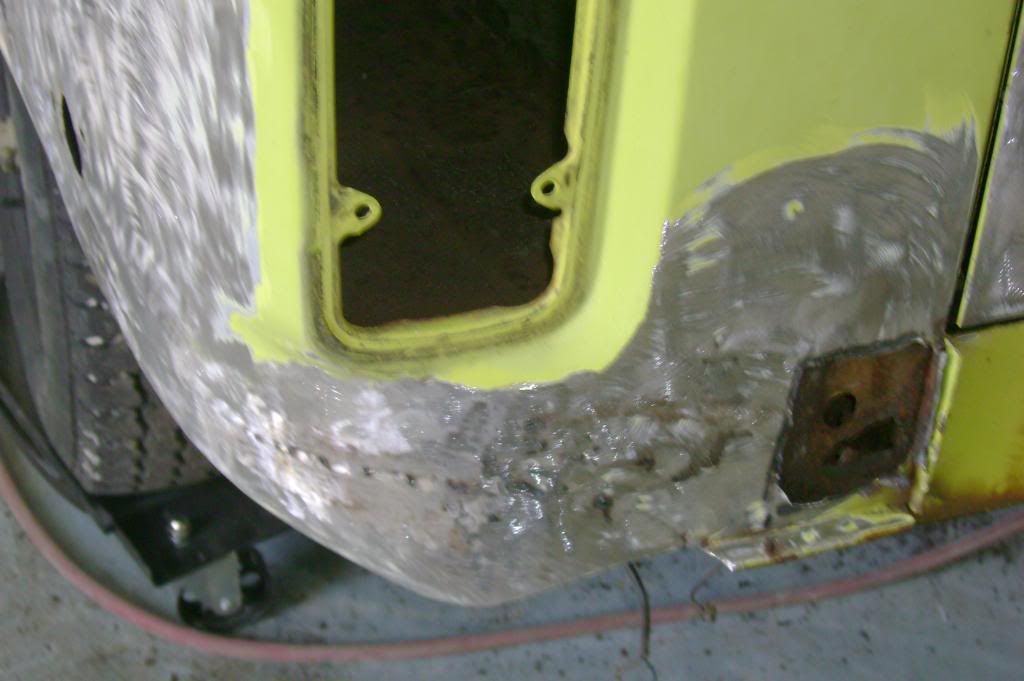
The nose got some attention after removing the spare tire mount.
Drivers door.
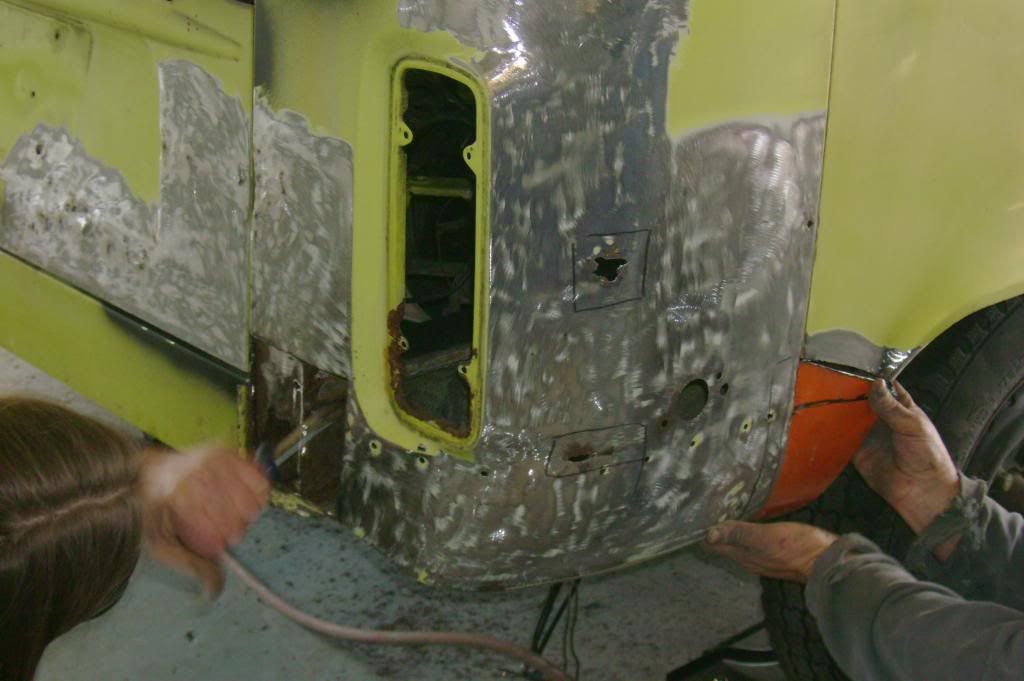
Willy and Eddie messaging on the big dent a little more.


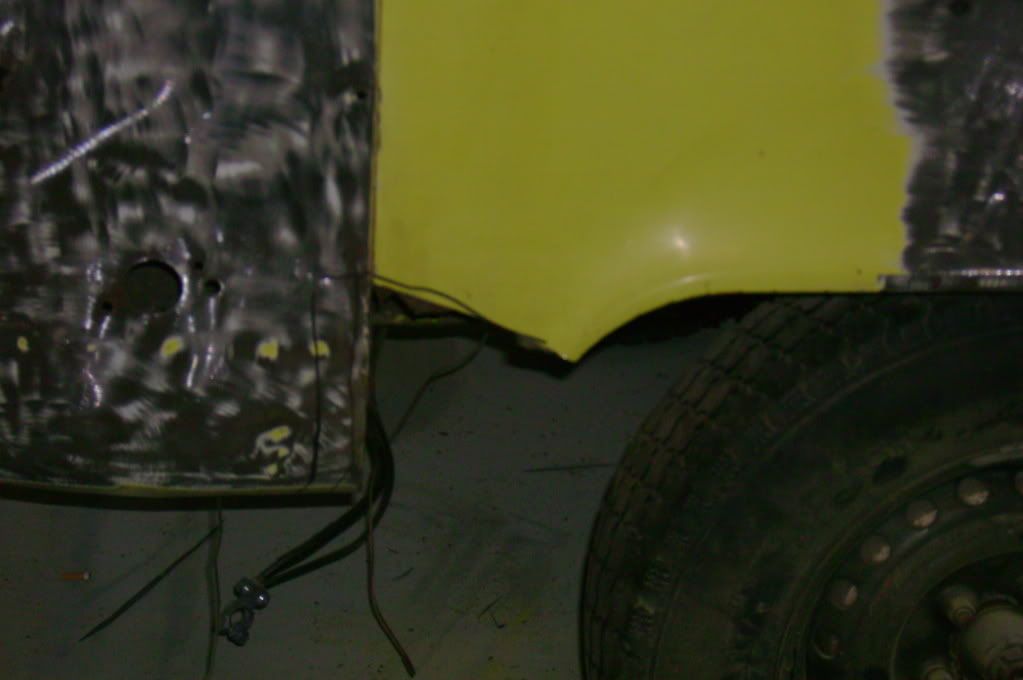
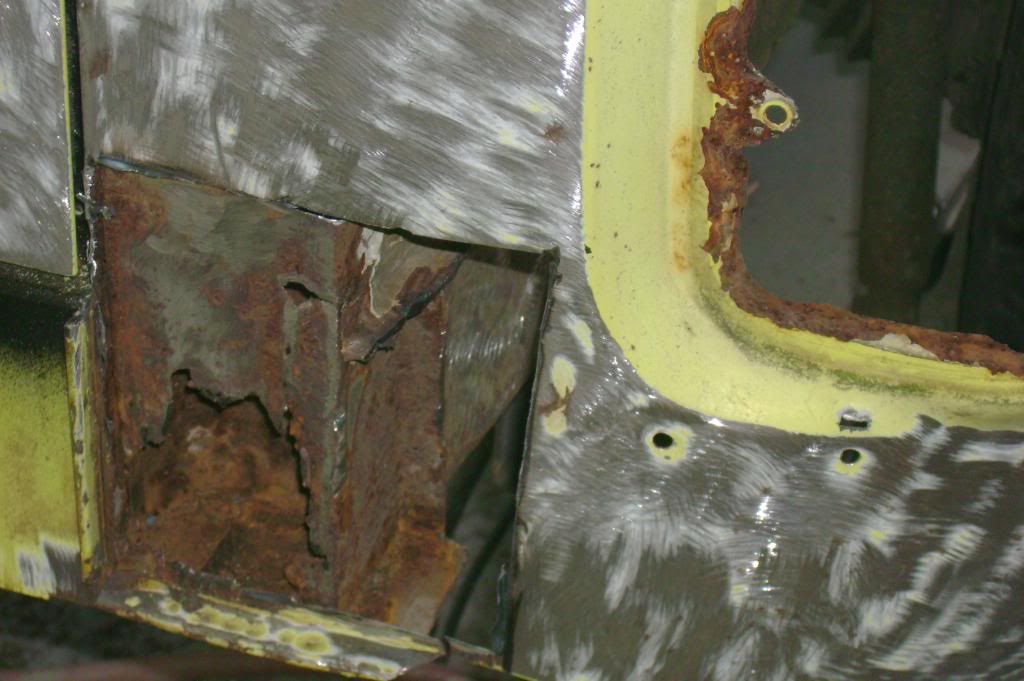
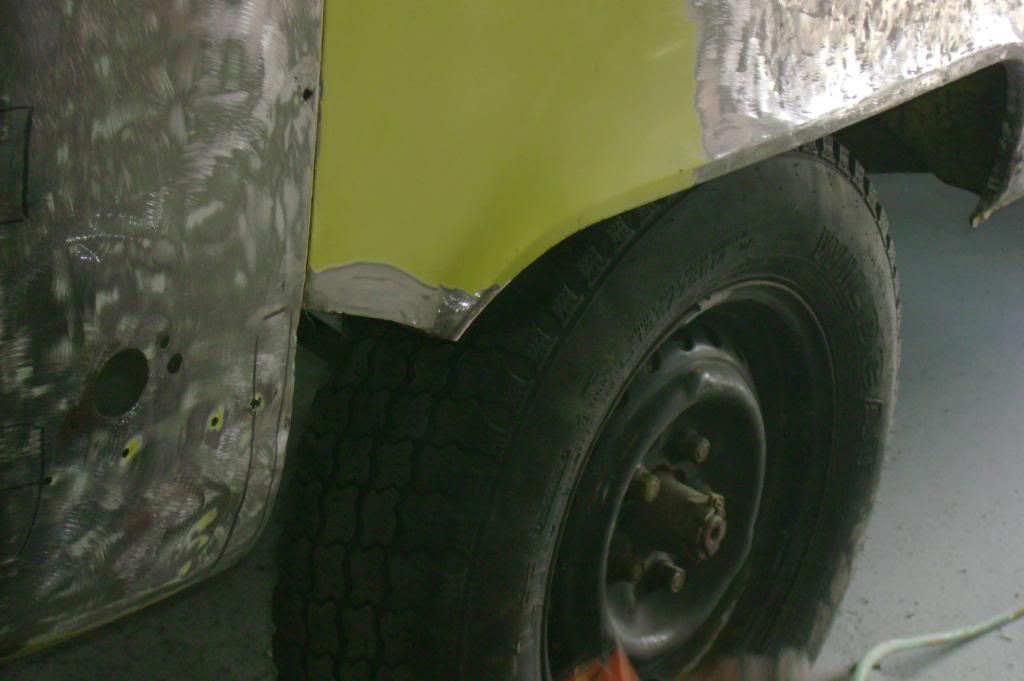
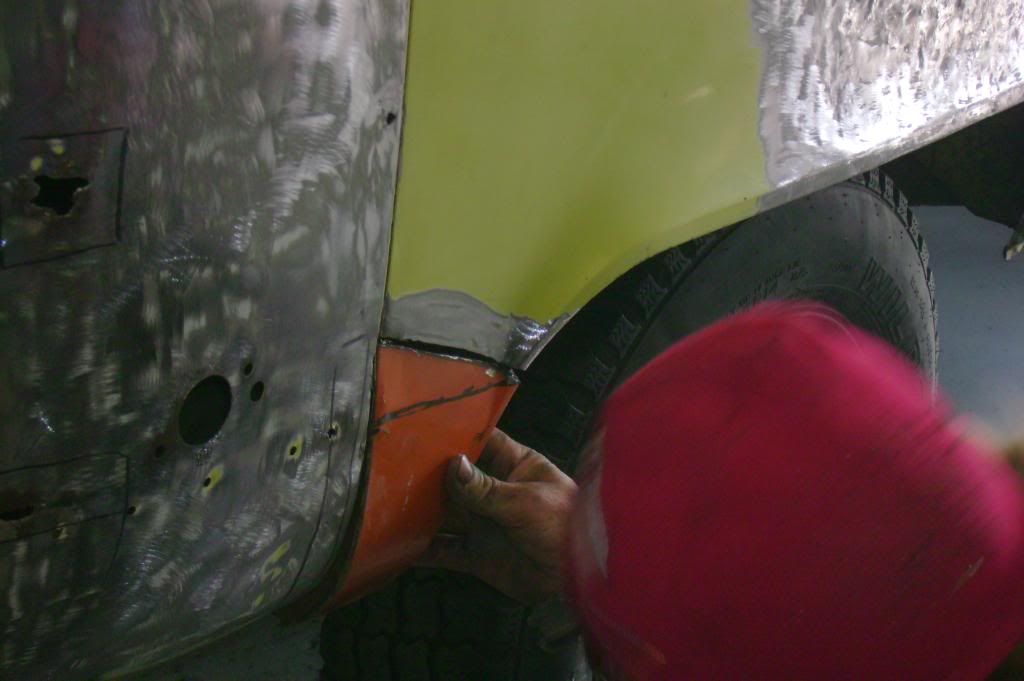
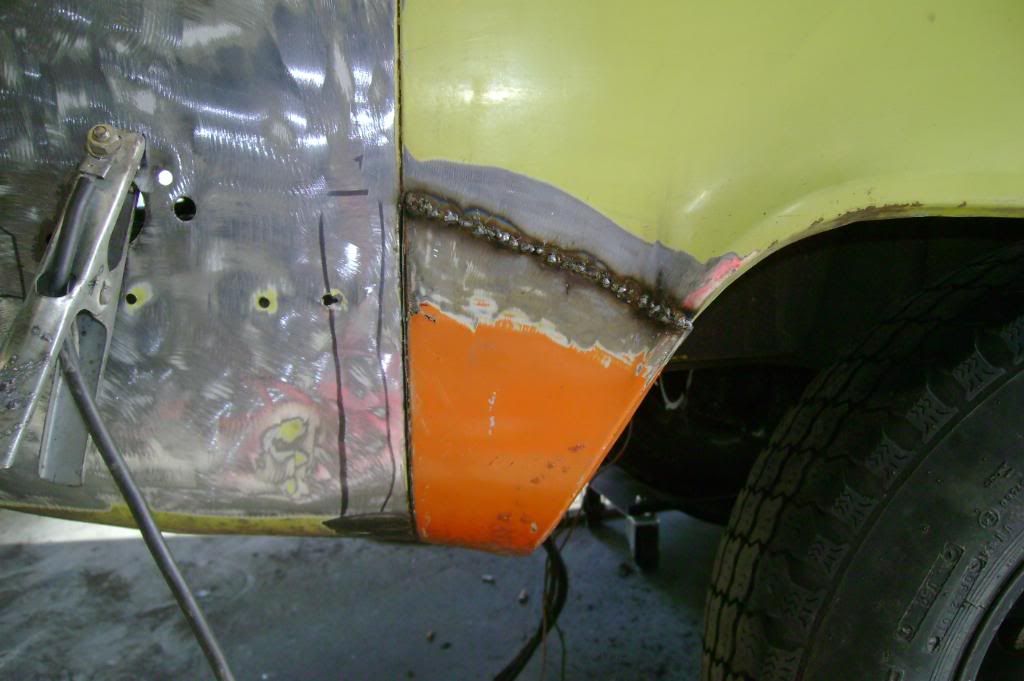
Rust in the wheel well.
This is cut out so a new piece can be welded back in.
While Willy works his magic I have been working on the Louver windows and sandblasting engine tin, bumper overriders, the stock wheels, and other misc. parts. I will try and post those pics before Friday.
We took last weekend off but plan to be in the shop this coming weekend April 24th / 25th.
I got in on the act by grinding away at a previous repair.
The nose got some attention after removing the spare tire mount.
Drivers door.
Willy and Eddie messaging on the big dent a little more.
Rust in the wheel well.
This is cut out so a new piece can be welded back in.
While Willy works his magic I have been working on the Louver windows and sandblasting engine tin, bumper overriders, the stock wheels, and other misc. parts. I will try and post those pics before Friday.
We took last weekend off but plan to be in the shop this coming weekend April 24th / 25th.
Mike Boell
1975 FI Westy
Oregon City
SOME PEOPLE ARE LIKE SLINKIES - NOT REALLY GOOD FOR ANYTHING BUT THEY BRING A SMILE TO YOUR FACE WHEN THEY'RE PUSHED DOWN THE STAIRS.
1975 FI Westy
Oregon City
SOME PEOPLE ARE LIKE SLINKIES - NOT REALLY GOOD FOR ANYTHING BUT THEY BRING A SMILE TO YOUR FACE WHEN THEY'RE PUSHED DOWN THE STAIRS.

-
Mike Boell
- Old School!
- Status: Offline
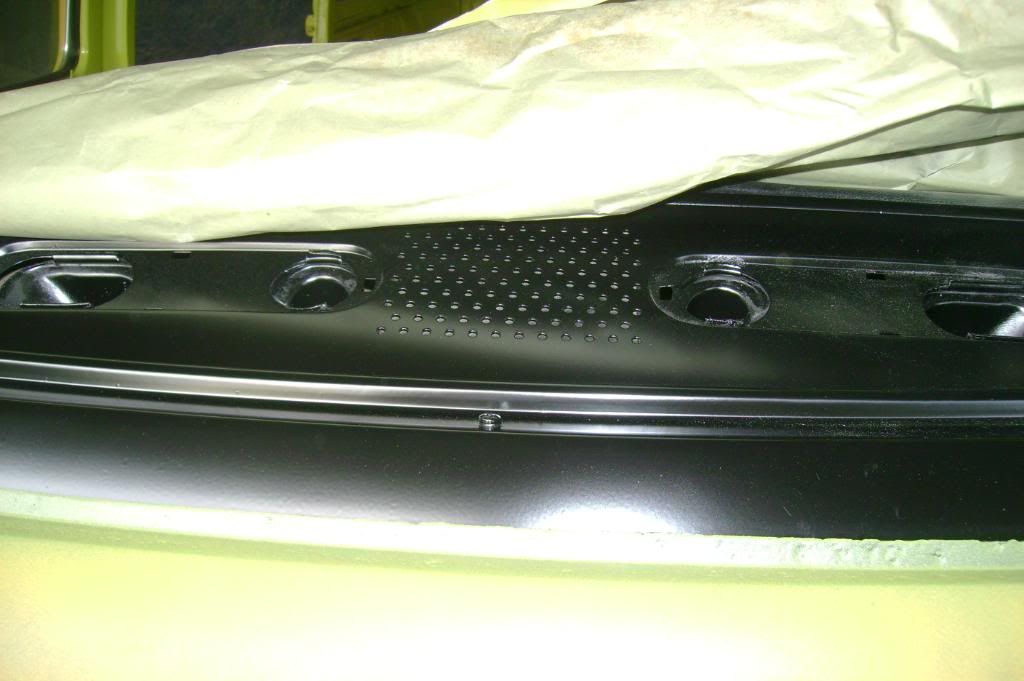
Windows
Well, I had to work today so no bus work going on for me.
I have been busy this past week a few hours each evening working on the louver windows. I'm not going to say this is the way to do it but it's they way I went about it.
Enjoy.
Here again is what the frames looked like after pulling the glass.

After paying to have them chemically cleaned they still did not look the way I wanted them. Willy told me I would need to drill out the rivets to rebuild the frames but I proved him wrong, NOT!
There is a seal that goes behind the pivot point that you can not access, plus the old steel rivet looks like he!!.

I purchased the seal kit from OE Vee Dub and so far I am very pleased.

As for the rivet's, I drilled out the old ones and purchased some stainless steel pop rivets.

The pop rivets when used did not allow the window to pivot freely so I drilled that out and replaced them with these.

I used a piece of steel to back the head and the punch to flare the rivet. Unlike the original rivet, I placed the nice side to the outside so the flared side is not seen.

To clean the aluminum, I used a scotch brite pad followed with some Mothers Polish.


Now, the old seals are crimped in the groove. So with the dremel I simply removed the crimp and cleaned up the groove.


Here is what the new seal looks like.

I used Teflube before running the seal into the groove.


So while I was working on the frames I sent the glass out for a light tint. I didn't want it real dark.

The seal for around the glass is one piece and fits quit nice.


Once the seal was around the glass I started placing the frame back into position. Again using Teflube and a small rubber mallet to work with I also found using a shorty feeler gauge to tuck the seal into place was helpful.

The first window pain was appropriately named because it was a pain! I did not start taking pictures until I started the second frame so here is what the first two look like.

Before stretching the seal around the third piece of glass I thought I would try something. I used the sanding disc on my dremel to round the square corners. I thought about this as when I removed the old seals they were all torn at this point.

So here are the three assembled pains.


Now, I noticed when I took these apart that there was some sealant around some of the screws and corners.

So after assembling the glass I used some grey gutter seal.


Here is the finished product.

Again, showing the next window to be cleaned and rebuild.

This is not a fast project. I am guessing the first pain took about 2 hours to assemble. The second also took about 2 hours but I was taking pictures along the way. The 3rd went a little faster and returning them to the frame was another hour or so.
So between the scotch brite pad, mothers polish, dremel work, assembly, I have a better part of 6 hours in this one window. Not saying this is the way to do it but I am happy with the finished product.
Onto window number two. Wish me luck.
Mike
I have been busy this past week a few hours each evening working on the louver windows. I'm not going to say this is the way to do it but it's they way I went about it.
Enjoy.
Here again is what the frames looked like after pulling the glass.
After paying to have them chemically cleaned they still did not look the way I wanted them. Willy told me I would need to drill out the rivets to rebuild the frames but I proved him wrong, NOT!
There is a seal that goes behind the pivot point that you can not access, plus the old steel rivet looks like he!!.
I purchased the seal kit from OE Vee Dub and so far I am very pleased.
As for the rivet's, I drilled out the old ones and purchased some stainless steel pop rivets.
The pop rivets when used did not allow the window to pivot freely so I drilled that out and replaced them with these.
I used a piece of steel to back the head and the punch to flare the rivet. Unlike the original rivet, I placed the nice side to the outside so the flared side is not seen.
To clean the aluminum, I used a scotch brite pad followed with some Mothers Polish.
Now, the old seals are crimped in the groove. So with the dremel I simply removed the crimp and cleaned up the groove.
Here is what the new seal looks like.
I used Teflube before running the seal into the groove.
So while I was working on the frames I sent the glass out for a light tint. I didn't want it real dark.
The seal for around the glass is one piece and fits quit nice.
Once the seal was around the glass I started placing the frame back into position. Again using Teflube and a small rubber mallet to work with I also found using a shorty feeler gauge to tuck the seal into place was helpful.
The first window pain was appropriately named because it was a pain! I did not start taking pictures until I started the second frame so here is what the first two look like.
Before stretching the seal around the third piece of glass I thought I would try something. I used the sanding disc on my dremel to round the square corners. I thought about this as when I removed the old seals they were all torn at this point.
So here are the three assembled pains.
Now, I noticed when I took these apart that there was some sealant around some of the screws and corners.
So after assembling the glass I used some grey gutter seal.
Here is the finished product.
Again, showing the next window to be cleaned and rebuild.
This is not a fast project. I am guessing the first pain took about 2 hours to assemble. The second also took about 2 hours but I was taking pictures along the way. The 3rd went a little faster and returning them to the frame was another hour or so.
So between the scotch brite pad, mothers polish, dremel work, assembly, I have a better part of 6 hours in this one window. Not saying this is the way to do it but I am happy with the finished product.
Onto window number two. Wish me luck.
Mike
Mike Boell
1975 FI Westy
Oregon City
SOME PEOPLE ARE LIKE SLINKIES - NOT REALLY GOOD FOR ANYTHING BUT THEY BRING A SMILE TO YOUR FACE WHEN THEY'RE PUSHED DOWN THE STAIRS.
1975 FI Westy
Oregon City
SOME PEOPLE ARE LIKE SLINKIES - NOT REALLY GOOD FOR ANYTHING BUT THEY BRING A SMILE TO YOUR FACE WHEN THEY'RE PUSHED DOWN THE STAIRS.

-
Oregon72

- IAC Addict!
- Location: Sherwood, Oregon
- Status: Offline
That looks INCREDIBLE!! the rubber parts on mine are dried up and crusty and when driving in heavy rain at highway speeds, my passenger side leaks a little bit and I have the typical black oxidation in the hard to reach spots - nuff about me... You do great work - I really like the little details and how you documented everything with photos. Well done!
-'72 Westy-
-
fancy pants
- Old School!
- Location: Portland
- Contact:
- Status: Offline
-
Mike Boell
- Old School!
- Status: Offline
more pics from Apr. 24 / 25
Well while I had to work last weekend, Willy and Eddie were hard at it again.
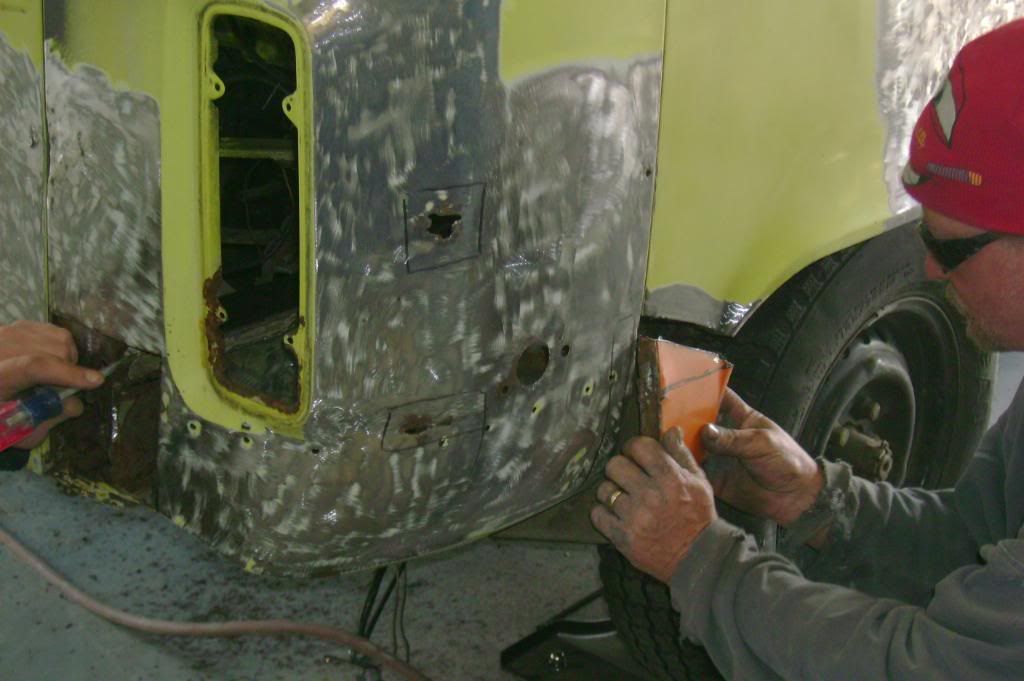
Rust in the usual places.
Starting battery side.
Aux. battery side.
A little rust and some dent pulling on the side I had been grinding on a few weeks ago.
All cut out to except a donor piece of metal.
A piece from Erics Winters 1975 Westy. A tree fell on Erics bus a year ago and with the Oregon Donor card his bus will live on.
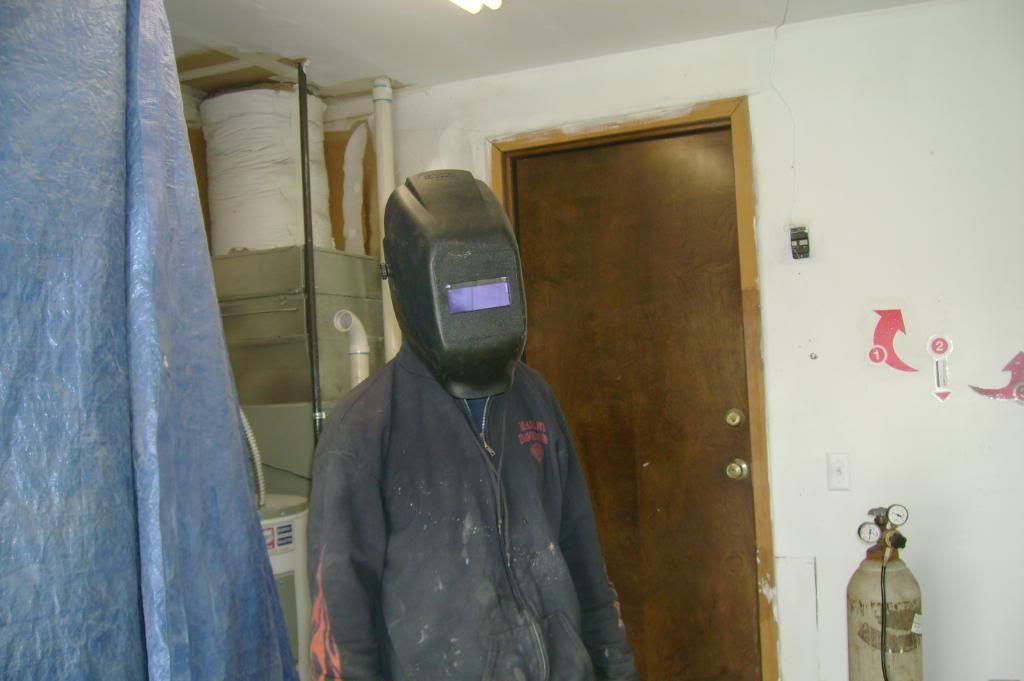
Eddie all dressed up for the dance.
And through the magic of television.
Rust in the usual places.
Starting battery side.
Aux. battery side.
A little rust and some dent pulling on the side I had been grinding on a few weeks ago.
All cut out to except a donor piece of metal.
A piece from Erics Winters 1975 Westy. A tree fell on Erics bus a year ago and with the Oregon Donor card his bus will live on.
Eddie all dressed up for the dance.
And through the magic of television.
Mike Boell
1975 FI Westy
Oregon City
SOME PEOPLE ARE LIKE SLINKIES - NOT REALLY GOOD FOR ANYTHING BUT THEY BRING A SMILE TO YOUR FACE WHEN THEY'RE PUSHED DOWN THE STAIRS.
1975 FI Westy
Oregon City
SOME PEOPLE ARE LIKE SLINKIES - NOT REALLY GOOD FOR ANYTHING BUT THEY BRING A SMILE TO YOUR FACE WHEN THEY'RE PUSHED DOWN THE STAIRS.

-
Quadratrückseite

- IAC's #1 Cubs Fan

- Location: Fremont, IN
- Contact:
- Status: Offline
I love this thread - very inspirational! In fact, it inspired me so much I went out and bought a stud welder today. I've got a ton of dents to pull. I love reading this - keep up the great work!
Those windows turned out incredible, BTW!!
Those windows turned out incredible, BTW!!
"The bus is the real talisman. It's the thing that runs through all of this history. It's not a thing anybody owns or controls. No matter how peeved you get with people, the bus always makes your heart jump. Everybody was attached to it."
- Ken Kesey
Steve
1978 Country Homes Camper conversion - "Gus"
http://gusthevwbus.com
http://freshandmodern.com/blog
- Ken Kesey
Steve
1978 Country Homes Camper conversion - "Gus"
http://gusthevwbus.com
http://freshandmodern.com/blog
-
Mike Boell
- Old School!
- Status: Offline
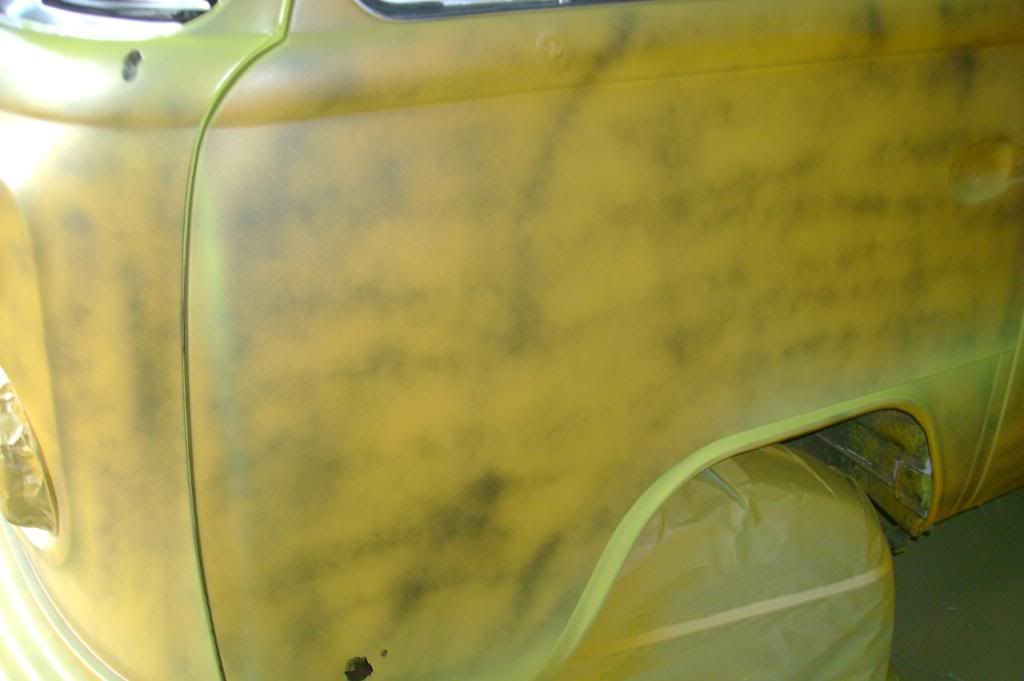
primer
So we have been having some computer technical problems the past couple weeks however the work has continued.
Here is the nose with a skim coat of bondo before sanding.
And a fresh coat of black on the dash while the window is out.
And the nose sanded and in primer.
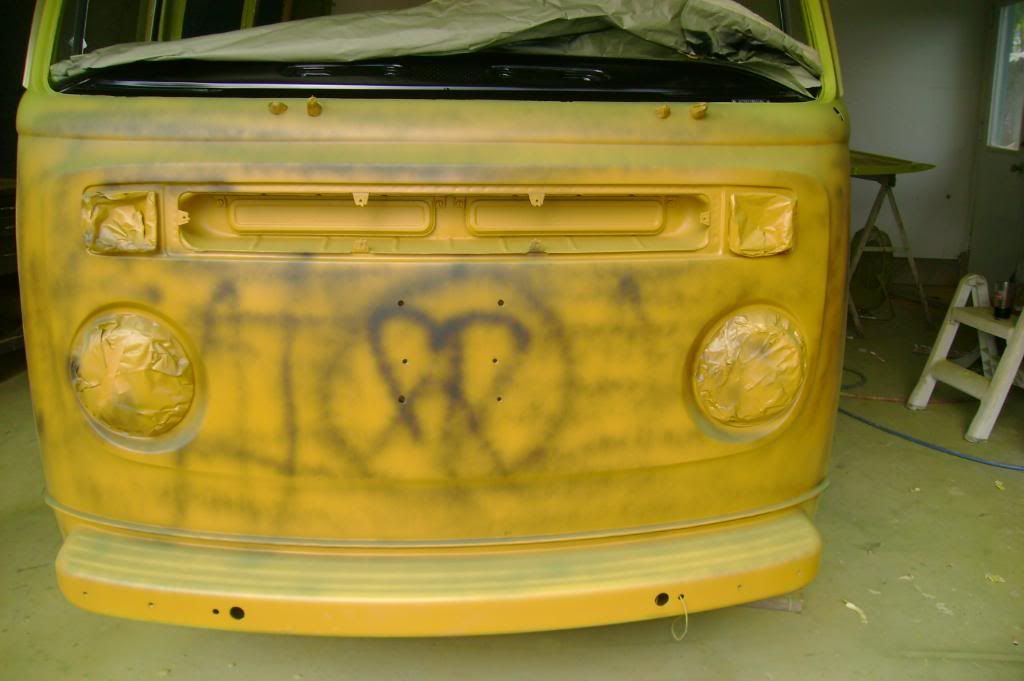
Here is the nose with a skim coat of bondo before sanding.
And a fresh coat of black on the dash while the window is out.
And the nose sanded and in primer.
Mike Boell
1975 FI Westy
Oregon City
SOME PEOPLE ARE LIKE SLINKIES - NOT REALLY GOOD FOR ANYTHING BUT THEY BRING A SMILE TO YOUR FACE WHEN THEY'RE PUSHED DOWN THE STAIRS.
1975 FI Westy
Oregon City
SOME PEOPLE ARE LIKE SLINKIES - NOT REALLY GOOD FOR ANYTHING BUT THEY BRING A SMILE TO YOUR FACE WHEN THEY'RE PUSHED DOWN THE STAIRS.